
为什么选择开通Zoho企业邮箱
国际品牌,本土服务
Zoho有26年软件行业积淀,拥有8千多人的专业研发团队,50多款SaaS产品,持久投入,稳定可靠,深受全球8千多万用户信赖。在中国有企业邮箱专属客服团队,1小时内响应。
多种集成
Zoho Mail集成了Zoho家族其它产品,比如可在CRM中直接查看客户往来邮件,可将邮件内容一键转为任务,可在邮箱里直接和同事聊天等。
安全合规
Zoho邮箱有多层安全基础设施保护,采用了国际安全标准和条例方面的优良做法,内置了多种审计与合规工具。并通过了 ISO/IEC 27001(信息安全管理系统标准)、SOC 2 Type II认证(SaaS 提供商在安全性、可用性、处理完整性、保密性和隐私方面的认证)、GDPR等国际认证。
自有数据中心,全球畅邮
Zoho在全球有16座自有数据中心,在中国有北京、上海两个数据中心,可智能选择海外安全链路,为海内外邮件沟通提供专属通道,邮件到达率高。
多种接口,更开放
Zoho邮箱提供丰富开放的邮箱API接口,支持单点登陆、用户同步、AD域统一验证等企业集成需求。
功能丰富
支持中/英文搜索、邮件正文翻译、支持imap/pop等协议、有手机客户端、速度快、定时发送、延迟发送、邮件过滤、委托他人代处理邮件、邮件撤回、反垃圾设置等。

“Zoho workplace 集合多种实用的协作办公软件,为乐我无限的跨区域办公、多业务经营提供了坚实的帮助,保证了公司的通讯交流稳定,安全便捷的管理文件和顺畅的线上的协同办公,解决了很多公司管理上的问题,实现了诸多方面的收益。”
企业邮箱安全和隐私保护
Zoho邮箱数据中心采用出色的安防和监控措施,有多层安全基础设施保护,可保证企业邮箱的正常运行时间。邮件数据借助静态和端到端加密以及 S/MIME 邮件加密获得安全保护。

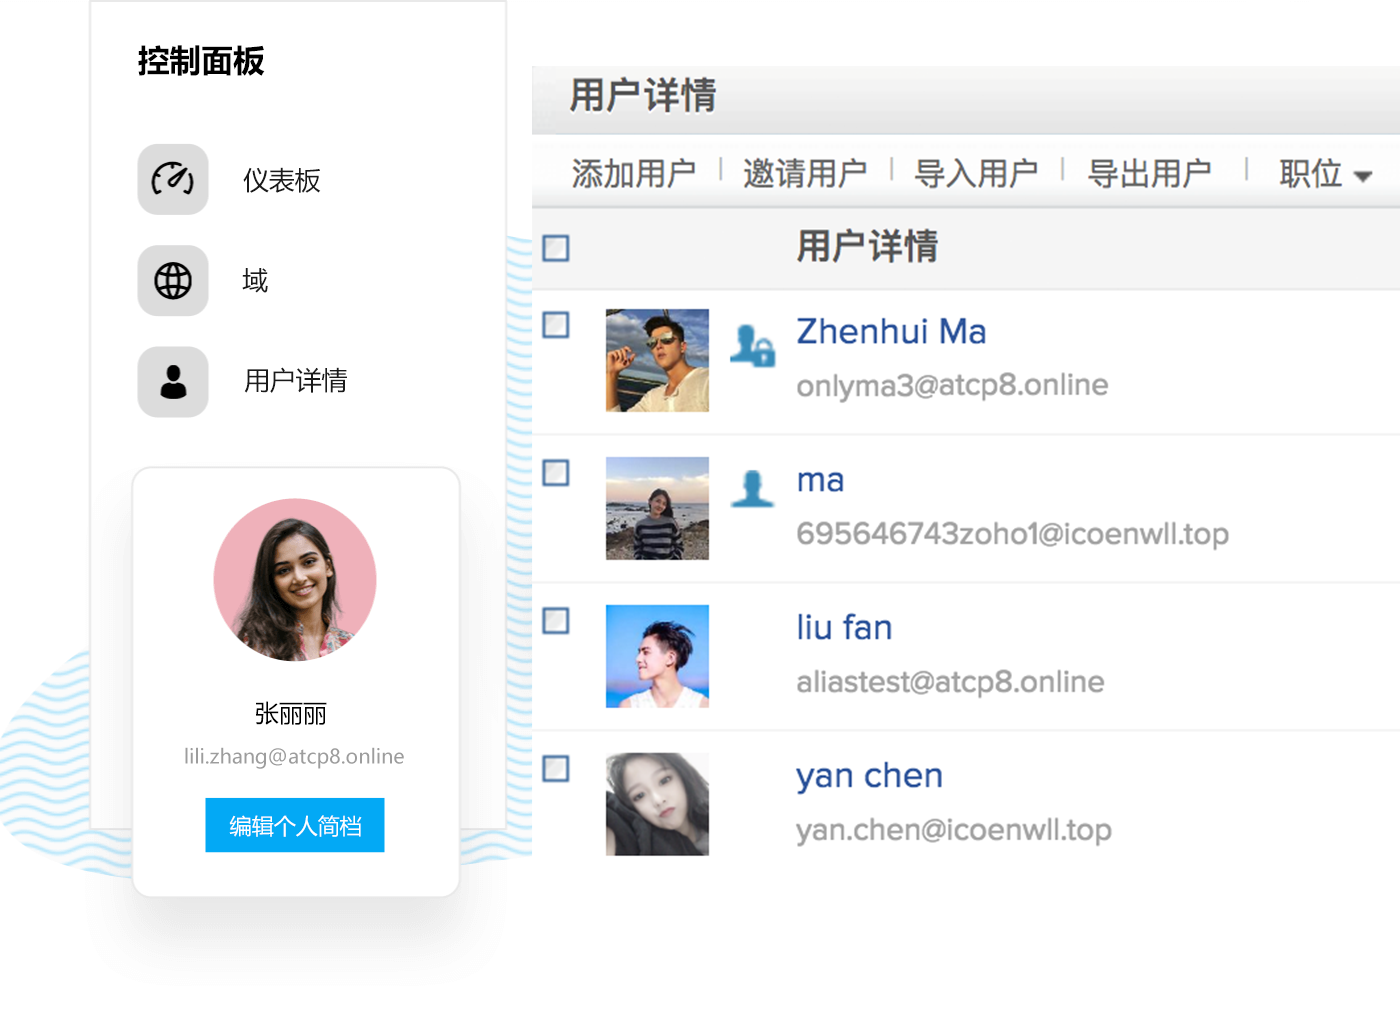
多功能的企业邮箱管理员设置
进入Zoho邮箱后台的管理员控制面板,可轻松管理用户、邮箱群组、电子邮件策略、存储空间配额等。
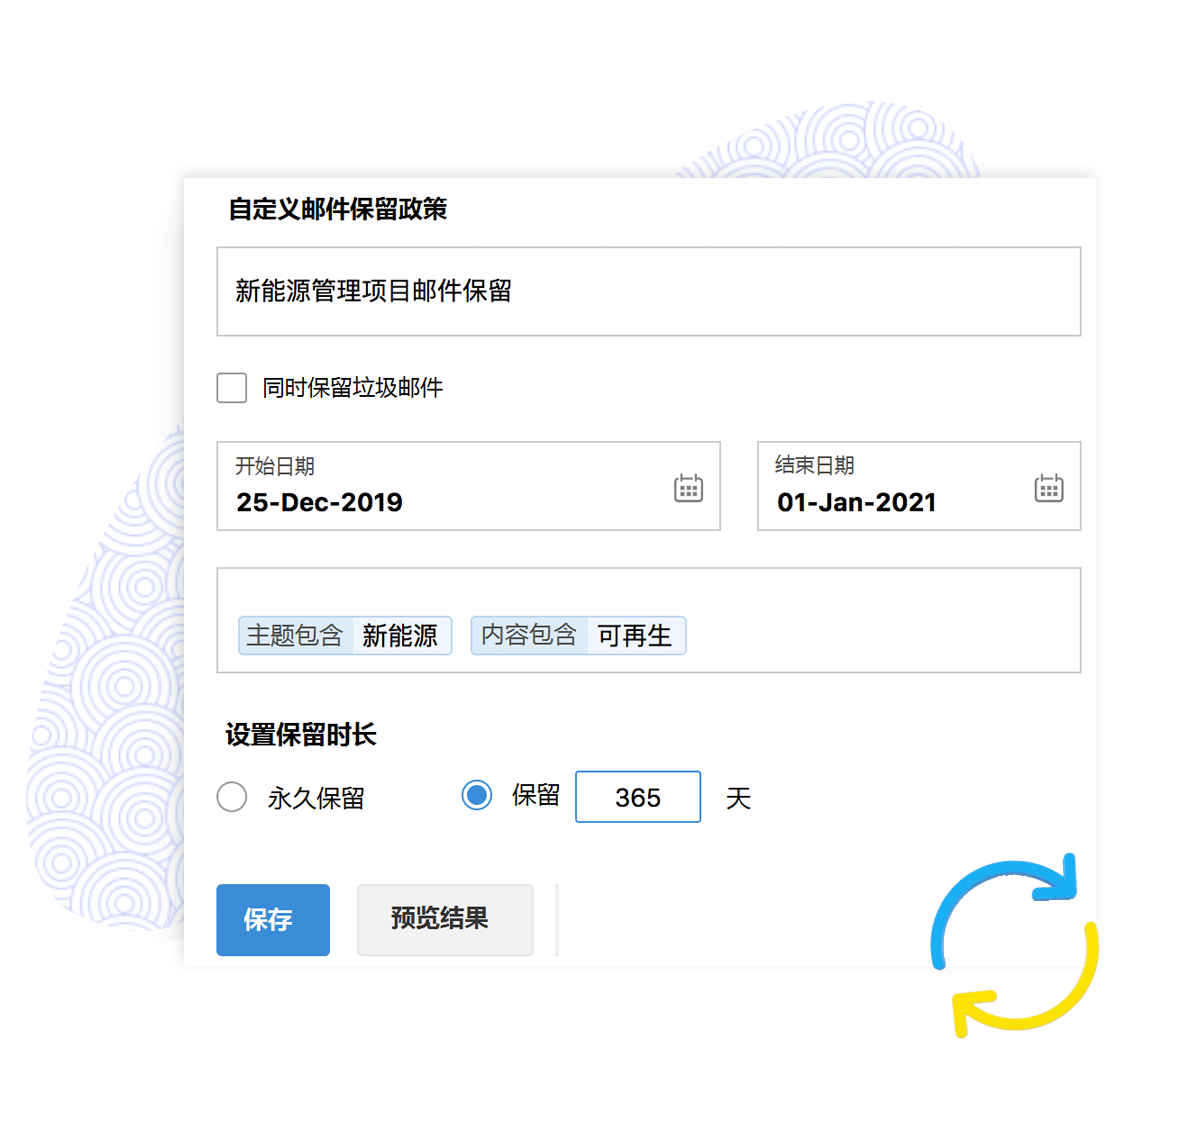
公司邮件备份恢复
邮箱管理员可以按时间备份整个公司邮箱里的所有邮件,并且在删除某些邮件后,仍可以在备份中恢复这些邮件。


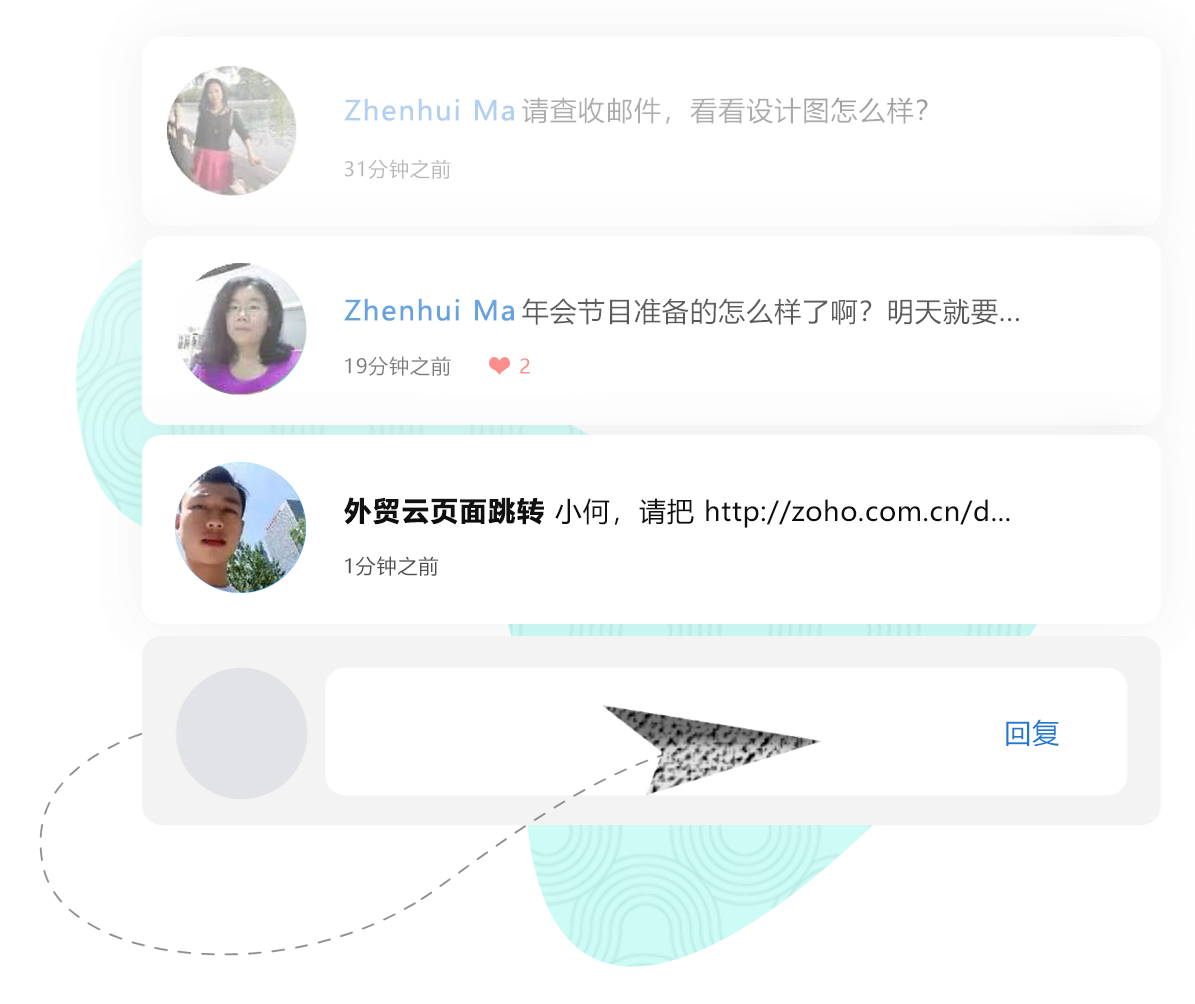
消息流 - 企业邮箱里的社交媒体
消息流功能为企业邮箱添加了社交元素,将单调的来往邮件线程替换为评论、@同事、共享文件、管理任务等,还有单独的app。
公司通讯数据隐私
Zoho高标准的隐私保护措施使您掌控自己的数据。
了解邮箱隐私政策轻松迁移企业邮箱
通过Zoho提供的迁移工具和 POP/IMAP 迁移,可从其它邮箱服务轻松切换到安全的 Zoho Mail企业邮箱。
了解企业邮箱迁移能集成 CRM的企业邮箱
Zoho Mail企业邮箱可与 Zoho CRM 集成,以更好地管理您的销售。还可与Zoho其他应用及第三方应用集成,让您事半功倍。
了解企业邮箱集成CRM
常见问题
什么是企业邮箱?
企业邮箱是您明确用于商业或专业通信的电子邮件帐户,一般以您的公司域名为后缀。这有助于提高品牌知名度,增加企业可信度,也有利于品牌营销。另外还可以设置群组邮箱、全局地址簿等,让团队协作更加高效。
企业邮箱与个人邮箱有什么不同?
个人邮箱适用于与朋友或家人的日常交流,或者用于注册个人服务和个人社交媒体帐户。企业邮箱适合管理企业通信和职场联系人。 企业邮箱通常可设置群组邮箱,有更大的存储空间、更针对企业使用的功能,比如邮箱迁移、控制面板等。
企业邮箱哪个好?
选择企业邮箱时,需要主要这4点。1、安全性,遵循国际主流安全标准,国家信息安全等级保护三级认证。2、隐私,包含打开邮箱时没有广告保持纯净性,拥有高级的隐私政策, 符合ISO 27701 - 隐私信息管理体系认证。3、协同办公能力,即支持其他人参与到你的邮件往来中。比如邮件委托、邮件共享等功能。4、高品质服务,快速响应,专业的技术支持在品牌选择中尤为重要。
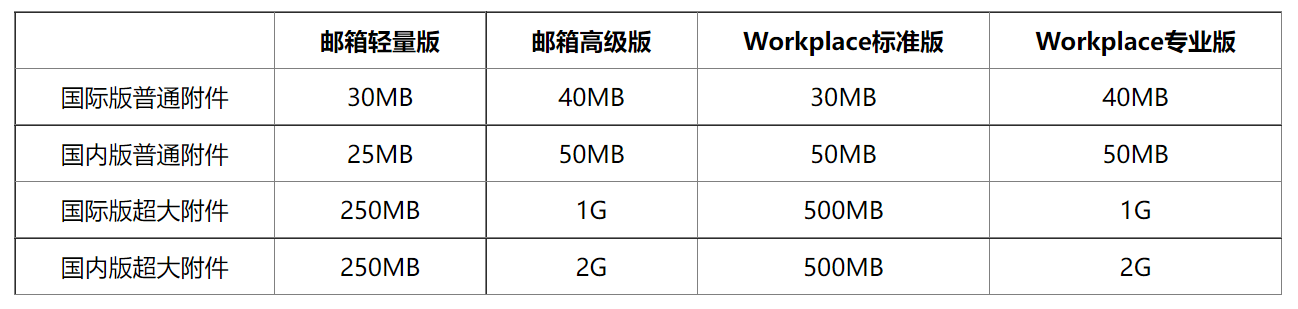
各版本的附件大小有什么差异?
邮箱单品和Workplace套件在功能上有什么差异?
企业邮箱怎么申请?
企业邮箱申请,是建立在域名的基础上的。需要先购买一个域名,然后购买一个电子邮箱账号,将域名和邮箱账号绑定在一起。就开通了一个企业邮箱。
如何在Zoho中创建企业邮箱?
首先需要您有一个网站域名,如果没有,请先去购买一个域名。然后购买一个Zoho邮箱账号,需要填写Zoho Mail网页上的注册表单,提交邮箱地址和手机号。进入产品后绑定您的企业域名,验证域名有效性。通过这2步之后,您就成功开通了一个Zoho企业邮箱。具体请见操作视频演示:点击查看
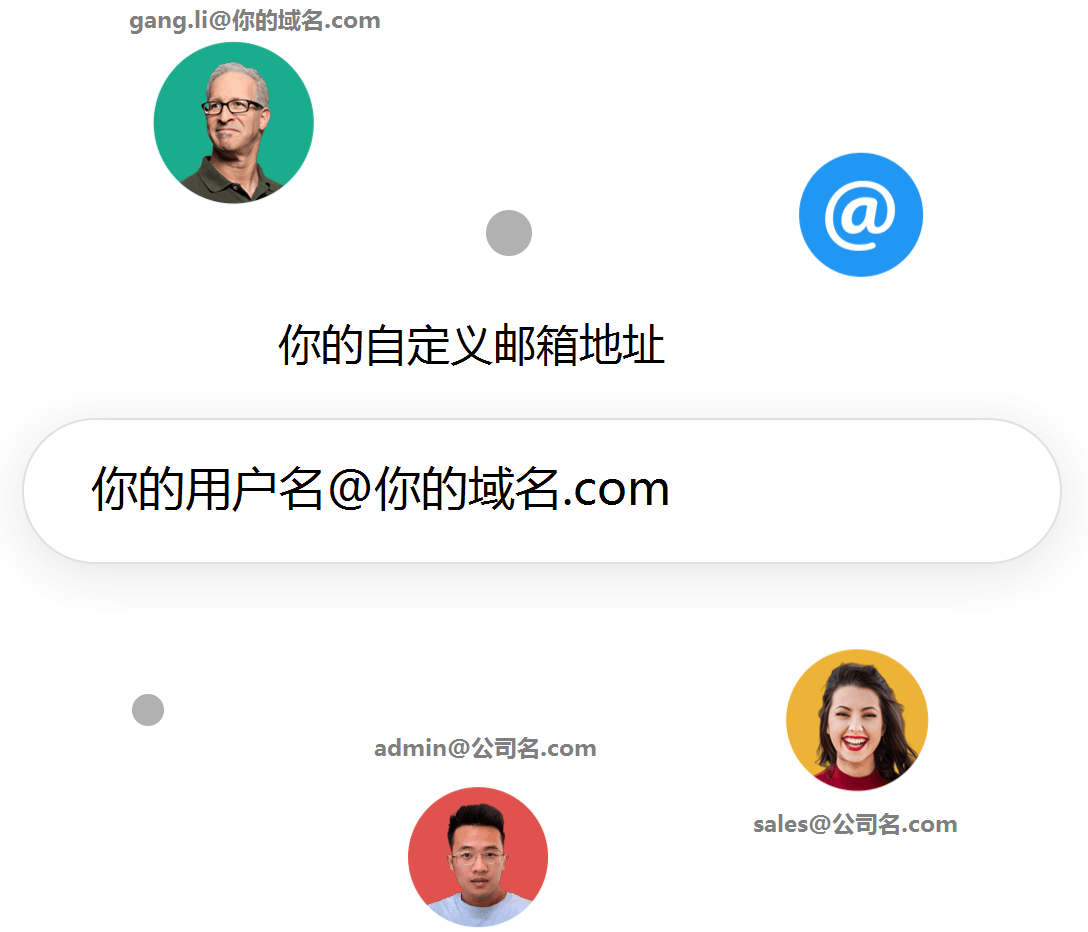
什么是公司域名邮箱?
公司域名邮箱,也称为企业邮箱或定制邮箱,是一种基于企业自主域名设置的电子邮件服务。它允许企业或个人使用自己的域名作为邮箱后缀,如“john@example.com”或“sales@mycompany.com”。这种邮箱地址不仅具有更高的品牌识别度,还能更好地体现企业的专业形象。 1. 品牌形象提升:使用公司或个人品牌的域名作为邮箱后缀,能够显著提升对外交流的专业度和信任感。 2. 统一管理:企业可以集中管理员工邮箱,便于设置统一的安全策略、邮件备份及归档,提高工作效率。 3. 广告效果增强:在每次邮件往来中,自定义的域名邮箱都是对品牌的一次无声宣传。 4. 灵活性与可扩展性:随着业务发展,可以轻松添加或删除邮箱账户,适应组织变化需求。
外贸企业邮箱的特点
1. 邮箱域名绑定:外贸企业邮箱通常允许用户使用自定义的企业域名作为邮箱后缀,如sales@yourcompany.com。这种形式不仅强化了企业品牌标识,使邮件往来更具专业性,更有利于提升客户对企业的认知度与信任感。 2. 大规模容量与高效管理:外贸企业邮箱通常提供大容量存储空间,满足企业大量邮件收发需求。同时,配备强大的邮件管理后台,支持多级权限设置、部门分组、员工账号管理等功能,便于企业根据实际需要进行高效组织与调配。 3. 全球畅邮与反垃圾防护:考虑到国际贸易涉及广泛的地域性,外贸企业邮箱具备优秀的全球邮件收发能力,通过与各大邮件服务商的良好信誉互认及IP解封机制,确保邮件送达率。此外,配备先进的反垃圾邮件系统和病毒查杀功能,有效过滤各类垃圾邮件和潜在威胁,保障通信环境的纯净与安全。 4. 移动办公与多终端适配:外贸企业邮箱普遍支持Web、桌面客户端(如Zoho Mail)、移动APP等多种访问方式,实现随时随地查阅、回复邮件。配合日程管理、任务分配、文件共享等协同办公功能,极大地提升了外贸团队的工作效率。 5. 法规遵从与数据备份:针对跨国业务可能涉及的数据合规问题,外贸企业邮箱通常遵循国际数据保护法规,如GDPR等,确保企业通信符合全球标准。同时,提供定期备份与恢复服务,以防数据丢失,保障企业信息资产的安全。