List Management
List management is a macro level to deal with contacts and take actions on them at your convenience. This provides a detail view of contacts with respect to mailing lists.
Create Mailing List
Every time, when you create an email campaign, it becomes cumbersome to choose every contact. Hence, it is always wise to create a mailing list which takes less effort and minimal time to reach out the recipients.
To create a mailing list, follow the steps below:
- Go to Contacts module --> List Management subtab.
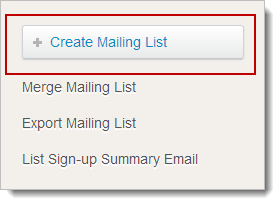
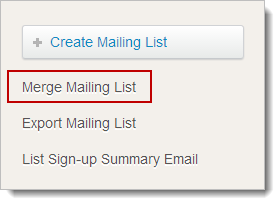
- In List Management page, click Create Mailing Lists option (present on the right hand side).
- In Add New List page, give a name to your mailing list in the given box and choose an option for the Sign-up form.
- Sign-up Form Subscription Allowed – Choosing this option will make the list public and link your Sign-up form to your mailing list so that anyone can sign-up for the mailing list.
- Sign-up Form Subscription Not Allowed – Choosing this option will make the mailing lists private and the only way to add contacts is through adding them manually.

- Click the Save & Add Contacts button to proceed.
- To add contacts, follow any of the options below:
- To add bulk Subscribers, enter email address and personal details in the box given. Click the Save button to proceed.(OR)
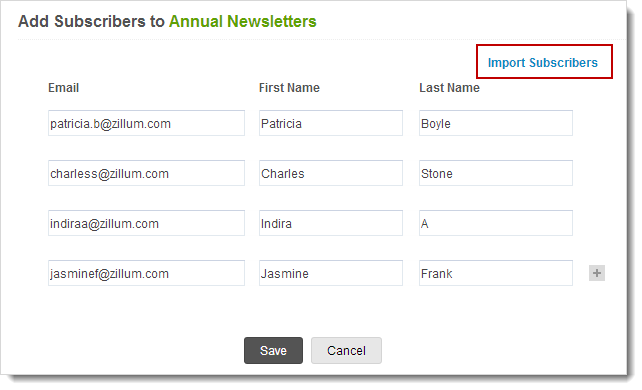
- To import subscribers, Click Import Subscribers link. This will take you to Import Multiple Contacts page, click Choose Filebutton to select the file you want to upload.
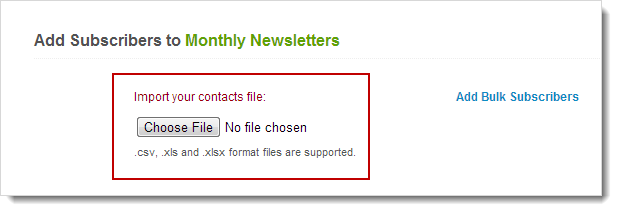
- Click the Upload button which will take you to Map your Fields page.
- In Map your Fieldspage, you can map the column headers of your file to the fields present in the mailing list.
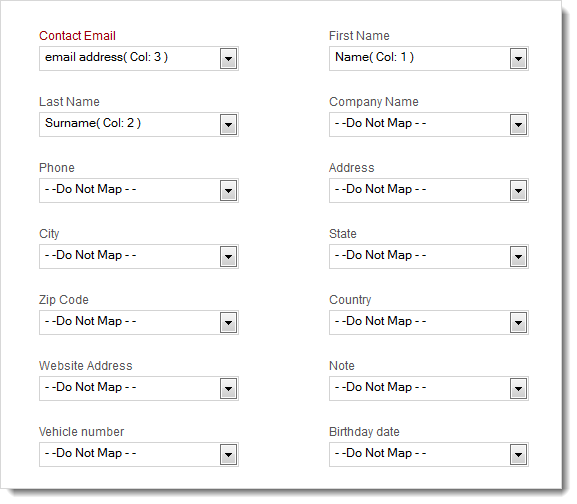
- Click the Import button to import the contacts.
Merge Mailing List
If you feel the same set of subscribers from two different lists are interested in the same product / newsletters, you can combine both mailing lists to create a new one. This could also be for maintaining a master list for your contacts, getting rid of duplicate or to maintain a backup for your contact details.
To merge the mailing lists, follow the steps below:
- Go to Contacts module --> List Management subtab.
- In List Management page, click Merge Mailing Lists option (present on the right hand side).
- In Merge Mailing Listspage, select the check boxes for the lists, you want to merge.
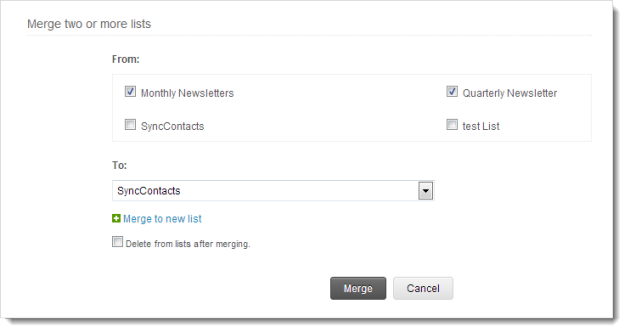
- Click the Select List drop-down menu to merge your contacts to an existing mailing list.
- Click Merge to New List link to merge the contacts to an entirely new list.
- Click the Merge button to confirm.
Note
- Select the Delete the list after merging check box to delete the existing mailing lists after merging the contacts to a new list.
Edit List to Enable Sign-up Form
You can edit the mailing lists to adjust the details in the lists created by you.
To edit a list, follow the steps below:
- Go to Contacts module --> List Management subtab.
- Hover on the Mailing Lists, you’d like to delete.
- Now, click the Edit List link.
- This will prompt to a pop-up page where you can edit the list.
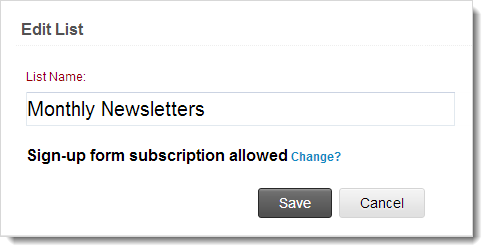
- Click the Save button.
Delete List
In email marketing business, you may feel a list is absolutely useless and might want to get rid of it. Well, though you can delete a list, you don't have to necessarily delete the contacts in the list. You can delete just the list and still maintain the contacts associated to the list.
To delete a list, follow the steps below:
- Go to Contacts module --> List Management subtab.
- Hover on the Mailing Lists, you’d like to delete.
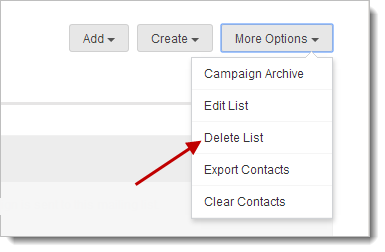
- Now, click the Delete List link.
- This will prompt to a pop-up page, select the checkbox to delete the list.
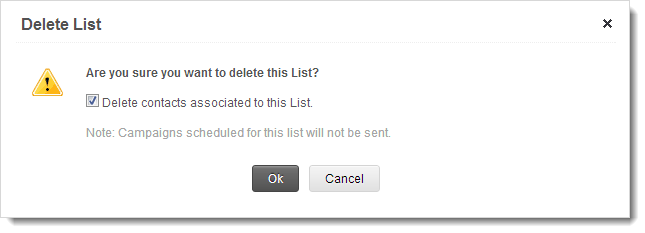
- Click the OK button.
Export List
At Zoho Campaigns, you can export your contacts from contacts module in any format so that it provides a backup for contacts. Apart from this, if you’ve sent a campaign to a mailing list, you can easily track the active contacts. While exporting the list, we’ll give the option to filter such active contacts only. Thus, you can maintain a clean list by importing the active contacts to a new list.
To export the mailing lists, follow the steps below:
- Go to Contacts module --> List Management subtab.
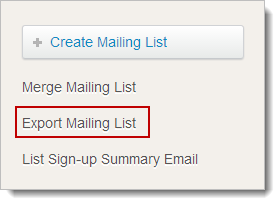
- In List Management page, click Export Mailing List option (present on the right hand side).
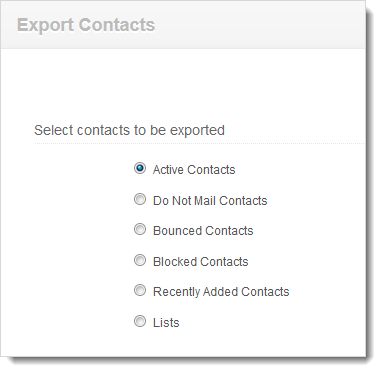
- In Export Mailing List page, do the following:
- Select contacts to be exported – Choose the type of contacts to be exported.
- Select fields to be exported – Select the checkbox fields to include additional information.
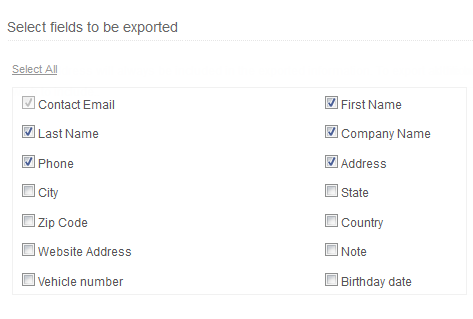
- File Name – Give a name to the file to be exported.
- Click the format (CSV, TSV, XLS, JSON, etc.); you want to export the file.

How do I mass update a field in my mailing list?
You can update a specific field for bulk contacts in simple and quick way.
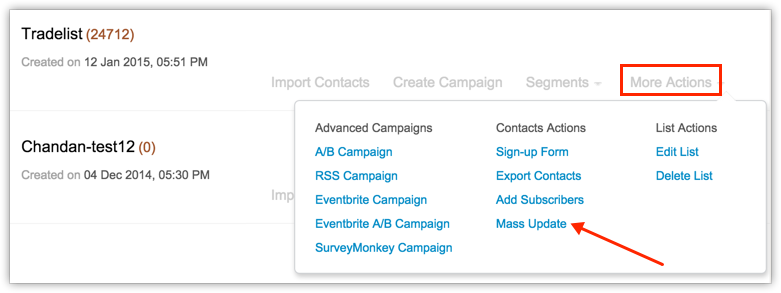
- Go to Contacts >> List Management
- In List Management page, click the More Actions link corresponding to mailing list you want to update.
- Under More Actions, click Mass update
- Select the field from drop-down menu, you wish to update
- Specify a value for the field to be updated

- Click proceed >> Update to confirm
Note
- You can select a sppecific segment of a mailing list or select few contacts under All Contacts to mass update fields.
- You can also select contacts through global and advanced search and mass update the fields.
Can I mass update a new custom field?
Yes, you can mass update a new custom field for bulk contacts.
- Go to Contacts >> List Management
- In List Management page, click the More Actions link corresponding to mailing list you want to update.
- Under More Actions, click Mass update
- Click Add new custom field link to create a new custom field
- Specify a value for the field to be updated
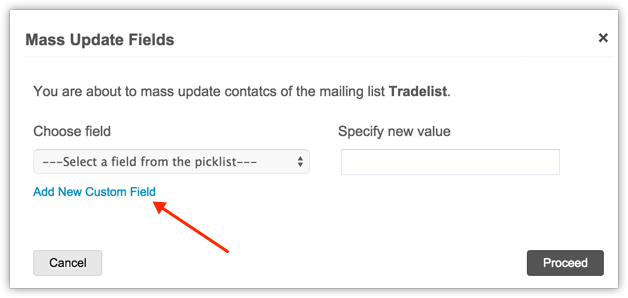
- Click proceed >> Update to confirm
View Local Subscribers and User Agent Stats
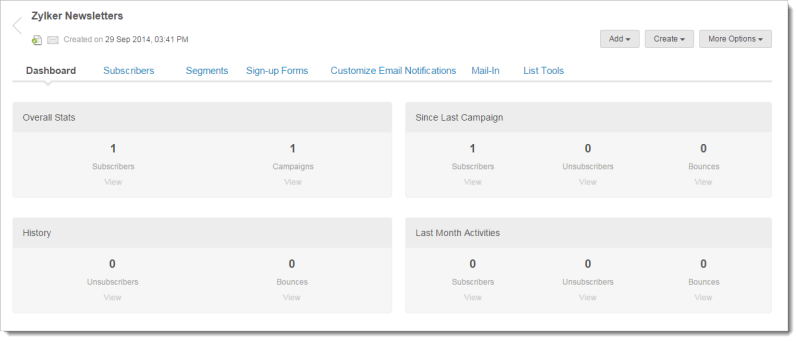
List Dashboard provides a detail view on contacts and summarizes the different parameters such as contact status, user agent statistics.
List Overview – This is a summary of contacts based on report summary generated on the basis of sent campaign(s). It lists out the number of active, bounced and unsubscribed contacts as well as number of campaigns sent and number of campaigns scheduled for this list.
Campaign Details – This shows the in-detail picture of number of campaigns sent to a mailing list.
Local Subscribers – This is a categorization of contacts based on your home country, region and city.
User Agent Statistics – This is 360 degree information about the devices and software used by a user to open your email campaign. It can be further classified into
- Devices and Operating Systems – It provides information about the gadgets (Computer, Tablet and Mobile) and operating system (Android, Linux, Windows, and Apple) used by the user.
- Desktop Email Clients – It lists out the different email clients such as Outlook, Lotus Notes, Thunderbird, Apple Mail, etc. used by subscribers.
- Web Browsers - It lists out the different web browsers such as Firefox, Chrome, Internet Explorer, Safari, Opera, etc. used by subscribers.
To view the List Dashboard, follow the steps below:
- Go to Contacts module --> List Management subtab.
- Click the Mailing Lists, you’d like to view.
- Now, click the Dashboard present next to Subscribers.
View Subscribers
From the subscribers screen, you can view the subscriber details such as first name, last name, email address, Gravatar image, etc. Apart from viewing the subscribers, you can search contacts, export contacts, and unsubscribe contacts from mailing list.
To generate the unique Mail-In id, follow the steps below:
- Go to Contacts tab --> List Management subtab.
- Click the Mailing Lists; you’d like to view the subscribers.
- Now, click the subscribers subtab present next to Dashboard.
Send Email Campaign from Webmail Client
Jeff wants to send an email campaign via Zoho Campaigns and he has already created and designed as an email from his personal email client. But, it is not possible to send this email as an attachment and send it to his mailing list in his campaigns’ account. In such cases, Zoho Campaigns comes to his rescue and helps him with a feature called Mail-In.
Every mailing list has its unique mail sending id called Mail-In which can be used to import your email campaign from Jeff’s email client. Once, Jeff sends the email campaign to this unique mail-in id, we store the campaign in the form of draft and later on, you can proceed by sending the email campaign to desired mailing list. Let us dive through how to setup and send campaign to Jeff’s campaigns account using Mail-In feature.
To generate the unique Mail-In id, follow the steps below:
- Go to Contacts module --> List Management subtab.
- Click the Mailing Lists; you’d like generate the mail-in id.
- Now, click the Mail-In option present next to Dashboard.
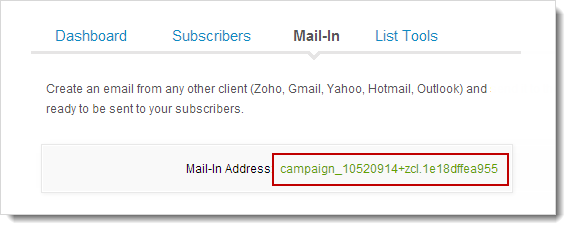
- Copy the unique Mail-In address displayed in the page.
- Send the email from your email client to the mail-In Address.
- You’ll receive a Confirmation email from Zoho Campaigns account stating that your email has been created as a draft campaign in your account.
Note
- The subject line of your email will be used as the subject line for your draft campaign.
- Always use single Mail-In address in TO header.
- Only emails from verified addresses will be accepted.
- You cannot forward your email as an attachment.
Receive Email Summary on New Subscribers
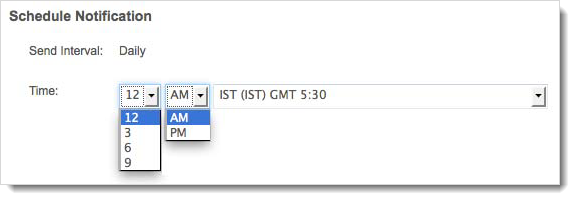
Zoho campaigns users can setup a notification email which provides the daily report on the number of new subscribers joining the selected mailing list. The report will be sent on daily basis and will provide detailed information about the new subscribers coming via Sign-up form or through APIs.
Here's how to setup List Sign-up Summary to your exact preferences.
- Go to Contacts module, Click Mailing Lists subtab.
- ClickList Sign-up Summary present on right side of the page.
- In List Sign-up Summary page, choose the Time Interval from the down menu.
- Select the relevant Mailing List(s).
- Click Save Preferences button to confirm.
Note
- You have 8 Time Slots to schedule the Sign-up summary email.
- Every user can configure one’s own List Sign-up summary email which can include other user's list. (If they are shared).
Archive Sent Email Campaigns on Website
You can make your sent campaigns public by embedding the campaign archive code on your website or social media account. This will make your subscribers or public members to have an instant access of sent campaigns, newsletters and updates. You can consolidate the past campaigns and make it viewable on your website so that anyone can view as well as share on social media.
To generate the campaign archive code,
- Go to Contacts module, click List Management subtab.
- In Mailing Lists page, click on the list (related to the campaigns, you want to publish).
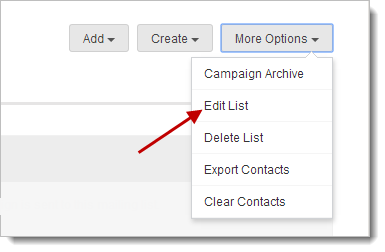
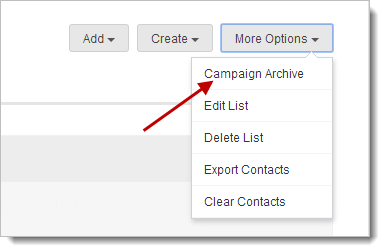
- Under More Actions button, click Campaign Archive
- If you've specified your email campaigns to be listed in the campaigns' archives, you'll get redirected to the Archive Code page.
- In the Archive Code page, click Archive Settings button.
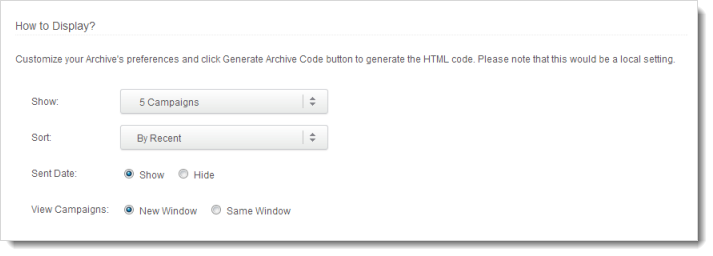
- Customize your Archive Display by selecting the options below.
- Click the Show drop-down menu to select the maximum number of campaigns to be displayed.
- Click the Sort drop-down menu to select your chronological preference.
- To show or hide the Campaign Sent Date, choose the related radio button.
- To show the campaign in the same or separate window, select the related radio button.
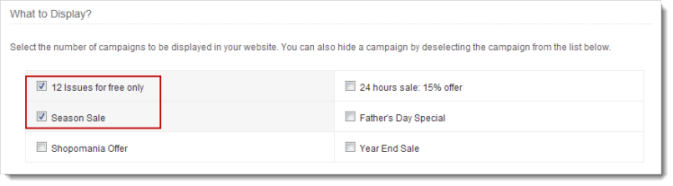
- Select the checkbox next to each campaign you wish to show, in the section What to Display.
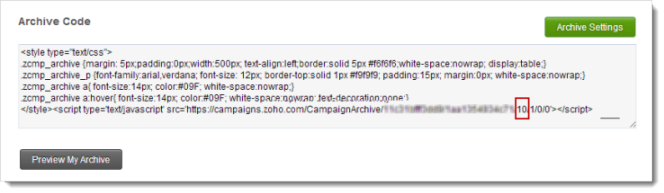
- Click the Generate Archive Code button.
- In Archive Code page, copy the generated code displayed in the box.
- Paste this code into your website to embed the sent campaigns.
Note
- You can click Preview My Archive button to view how your campaign archive would look on your website.
- You can change the maximum number of campaigns displayed by changing the number in the embedded code.
Edit Archive Code
You can edit your archive code and select the options to show the campaign sent date, select your preferences such as chronological order, open in separate tab.
To edit your Archive code,
- In the Archive Code page, click Archive Settings button.
- Customize your Archive Display by selecting the options below.
- Click the Show drop-down menu to select the maximum number of campaigns to be displayed.
- Click the Sort drop-down menu to select your chronological preference.
- To show or hide the Campaign Sent Date, choose the related radio button.
- To show the campaign in the same or separate window, select the related radio button.
- Select the checkbox next to each campaign you wish to show, in the section What to Display.
Note
- You can make a campaign visible or hidden on your website by choosing the campaign under What to Display section.
- Alternatively, In the final stage of sending an email campaign, click the Campaign Archive button. In the drop-down box select the check box to make your campaign visible.
Archive Reports
In the archive section of your website, you can view a social bar which will reflect the various social media sites where the subscriber or a public member can like, comment, tweet and share the campaign archive on leading social media. The report based on social stats would be updated in the social stats section of Campaign Reports.
To view archive based social stats,
- Go to your Reports module --> Sent Campaigns.
- In Sent Campaigns page, click on the sent campaign.
- Go to the Social Stats situated on the right side menu.
- Here you'll view the social media reports under Campaign Archive.

Use List Key for API
To access list management API methods, you need a mandatory parameter "listkey". The listkey represents the mailing list you're trying to access.
- Go to Contacts module --> Mailing Lists
subtab. - In Mailing Lists page, click the Mailing list, you'd like to generate the list key.
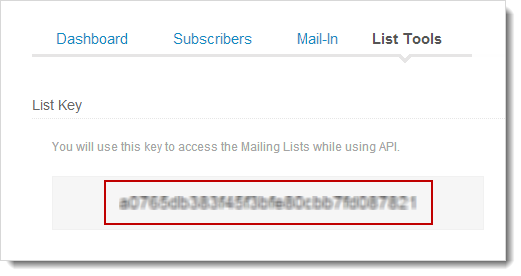
- Go to List Tools subtab.
- Copy the List key.
List Key – This purpose of this key is to add contacts to a mailing list and is used to access the mailing list using API.
Customizing Email Notifications
You can customize the notification emails which can be sent to subscribers based on their actions such as update profile, unsubscribe, etc. Here we are also going to discuss how to customize and define the settings for notification emails.
To customize email notification settings, follow the steps below:
- Go to Contacts--> List Management
- Select mailing list, you want to customize notifications
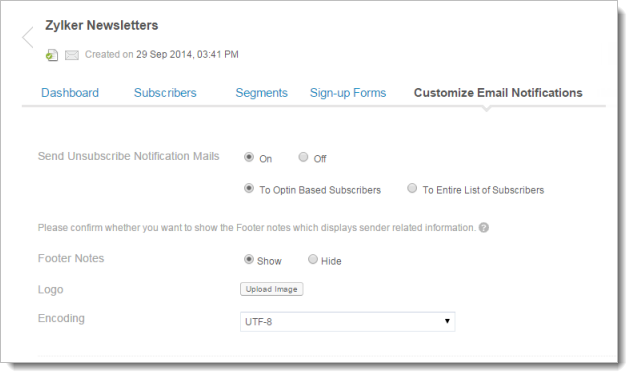
- Click Notification Mails Customization to opt your preferences
- Send Unsubscribe Notification Mails – You can disable the notification emails sent to subscribers
- Footer Notes – You can either show/hide the footer notes sent with notification emails
- Logo – Add your own logo by clicking the Upload Image button
- Encoding – Select the character encoding for the emails
Note
- Mark as Abuse is a mandatory information and it cannot be removed from the footer section of email.
To customize email notification content, follow the steps below:
Choose mail for Preview – Select the notification mail from drop-down menu to edit the mail.
Double-click the email template to edit the content.
- Update Profile – An email with a link is sent to the subscriber to update the profile
- Unsubscribe Confirmation – An email is sent to confirm the unsubscribe
- All List Unsubscribe Confirmation – A confirmation email is sent that the contact will no more receive any email from the organization.
- Update Profile Confirmation – A confirmation email is sent to verify the changes made in the profile
- Email Changed Notification – A notification email is sent that email address has been changed.
- Abuse Confirmation – A confirmation email is sent to subscriber that the contact has been moved to Do-not-mail registry.
Note
- You can customize your unsubscribe confirmation email to add Resubscribe link. .
