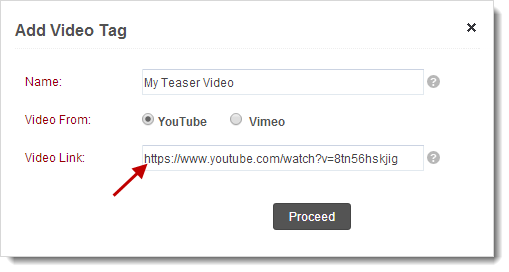
You can link videos from YouTube and Vimeo in your email campaigns in the form of thumbnail images using media based merge tags. Lets see how to create a video based email campaign.
To add a video from YouTube or Vimeo in your email campaign, you need to create Video Tags.
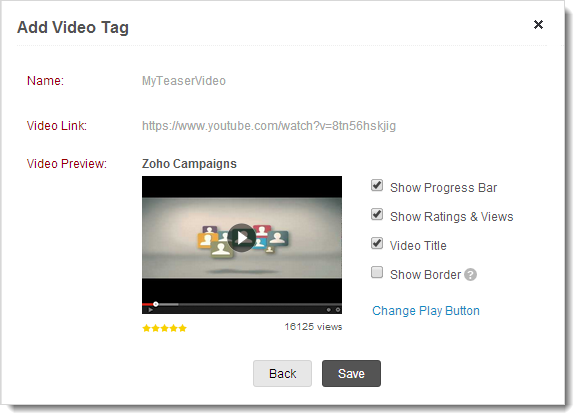
Your Video Tag is created and can be added to your email campaign.
Go to Email campaigns module, click Create Campaign or go to Home module. In Getting Started page, Click Create Campaign.
In the Create Campaign page, enter the campaign details such as Campaign name, subject, sender’s name, etc.
| Field | Description |
| Campaign Name | To identify the email. |
| Campaign Subject | A suitable subject line to describe your Campaign. |
| Sender’s Name | Mention your name or your organization’s name. |
| Sender’s email address | Specify your business email address. (The email address associated with your Zoho Campaigns account will be set as sender address by default). |
| Reply to Address | This should be the same as sender’s email address. |
In this step, you add the video merge (media) tags to your email content.

Note
1. In Choose Recipients page, select the mailings list(s).
2. If you’ve not created any list you’ll be asked to create one. Learn how to import Contacts.
Before you send your campaign, it is reviewed by our moderators who check the content, subject line and mailing list and verify anti-spam compliance.
In the Delivery options page, you have three different options:
