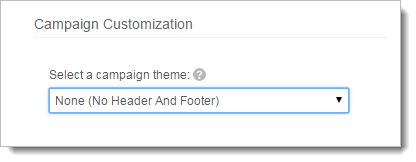
Customize the look and feel of your header and footer details. You can add, or edit the following content:
If you don't want to these links to be reflected as part of the Header & Footer section, you can use Merge Tags to embed Header & Footer links within the campaign content.
| Merge Tags | Related Links |
|---|---|
| $[LI:SUBSCRIBE]$ | Subscribe Link |
| $[LI:UNSUBSCRIBE]$ | Unsubscribe Link |
| $[LI:TELLAFRIEND]$ | Tell a Friend Link |
| $[LI:UPDATEPROFILE]$ | Update Profile Link |
| $[LI:VIEWINBROWSER]$ | View in Browser Link |
| $[HF:ORGADDRESS]$ | Company Address |
Note
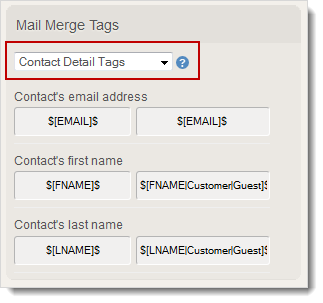
Add your recipients’ name, address, and other details by using merge tags. Merge Tags are smart tags that pull recipient specific data directly from your mailing list into your email message. You can also add merge-tags to the subject and/or the content.
Note
Personalize your subject -- the easiest shortcut to grab your subscribers' attention when they see the mail in their inbox. Our easy-to-use merge tags help tailoring the subject to the audience.
Usage of First Name in Subject Line
Use your customer's first name by inserting a merge tag like this:
“Hey $[FNAME|Subscriber]$, Your Weekly Updates” would look like “Hey Subscriber, Your Weekly Updates”.
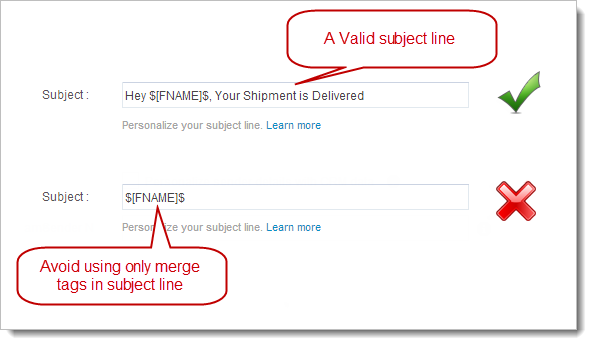
It is always suggested to use a standard subject rather than adding only merge tags in the subject line.
For example, if you want to send an email to a recipient about an order delivery, then it should look like Hi $[FNAME]$, Your Shipment is Delivered rather than $[FNAME]$.
Here are a few tips:
These are merge tags that pull information from your list details.
$[ML:LISTNAME]$ - Displays the list name.
$[ML:LISTSUBCOUNT]$ - Displays the number of subscribers present in the list.
You can also include merge tags for sharing the email campaign on Facebook, Twitter and, LinkedIn. This will allow your subscribers to share your email campaign on social media. Let’s take a look at the different types of Social Share Tags.
In the content configuration page, you can find social share tags on the right side. Just copy the specific merge tag and paste it in your campaign content. We’ll provide the link or icon depending upon the type of merge tag selected for the sharing.
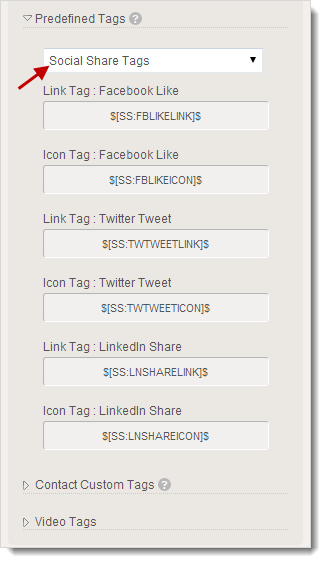
Link Based Tags
These are social sharing links which allow your subscriber to share the campaign on social sites such as Facebook, Twitter, and LinkedIn.
To share on Facebook - $[SS:FBLIKELINK]$
To share on Twitter -$[SS:TWTWEETLINK]$
To share on LinkedIn - $[SS:LNSHARELINK]$
Icon Based Tags
These are social sharing icons which allow your subscriber to share the campaign on social sites such as Facebook, Tweeter, and LinkedIn. In an icon based tag, “Like” is the title tag and “Like this” is the Alt text for the icon.
To share on Facebook - $[SS:FBLIKEICON|Like|Like this]$
To share on Twitter - $[SS:TWTWEETICON|Tweet|Tweet this]$
To share on LinkedIn - $[SS:LNSHAREICON|Share|Share this]$
Note
You can provide an option to print the email campaign using merge tags. These essential tags let your subscribers print your email campaign. Let’s take a look at the different types of print tags.
$[ET:PRINTLINK]$ - This is displayed in the form of a link to print the email campaign.
$[ET:PRINTICON]$ - This is displayed in the form of icon to print the email campaign.
$[ET:PRINTICON|Print|Print this]$ - This is also displayed in the form of icon with Print as hover message.
You can add an option for users to post comments on your email campaign. All you need is add relevant merge tags in campaign content.
$[ET:COMMENTS_LINK]$ - This is displayed in the form of link to add comment in email campaign.
$[ET:COMMENTS_ICON]$ - This is displayed in the form of icon to add comment in email campaign.
$[ET:COMMENTS_ICON|Comments|Add comments]$ - This is displayed in the form of icon with hover comment as Add Comment in email campaign.
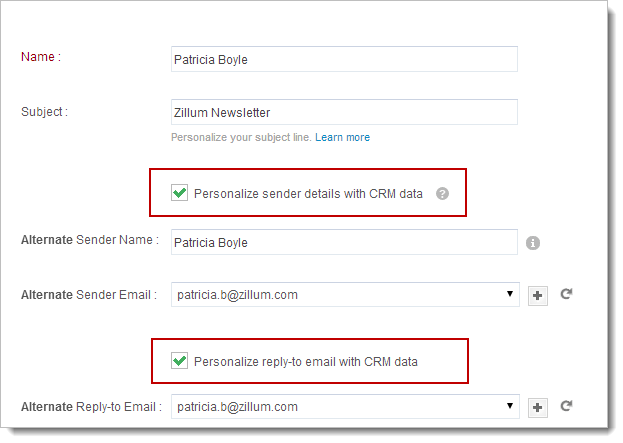
Using Zoho Campaigns, you can send an email campaign with a personalized sender name and email address of a Contact/Lead owner who is associated with that record in CRM.
If the Contact/Lead owner's name/email address is not present in Zoho CRM, then you can add value in Alternate sender name and email which will be used to send the campaign.
Note
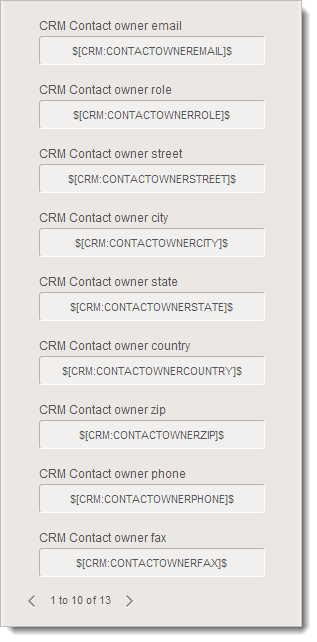
You can also use CRM based merge tags which automatically pull information from your CRM account. All you need to do is add relevant merge tags in your campaign content. The merge tags pull specific data from CRM based on how the information is requested within the email content.
This means you need to be cautious in placing the merge tags in an appropriate way.
These are the merge tags which will fetch the information from the CRM account:
Note
