Overview
Multi Select fields allow users to select one or more entry from a list of pre-set choices, instead of typing them. Zoho Creator supports the following types of Multi Select fields:
- Checkbox: Checkbox fields allow the user to choose one or more options from a list of choices displayed. They are easier to read and require fewer interactions/clicks to use. Sure, they take up more space, but in Forms where maximizing space is not an issue, but visibility of available options is, then check boxes would be a better UI choice for selecting multiple options.
- Multi Select: A Multi Select list provides the user with many choices in a limited space. It allows the user to choose one or more than one option from the list of choices. A Multi Select list takes two or more clicks (to open the list, scroll, and select) to make the selections.
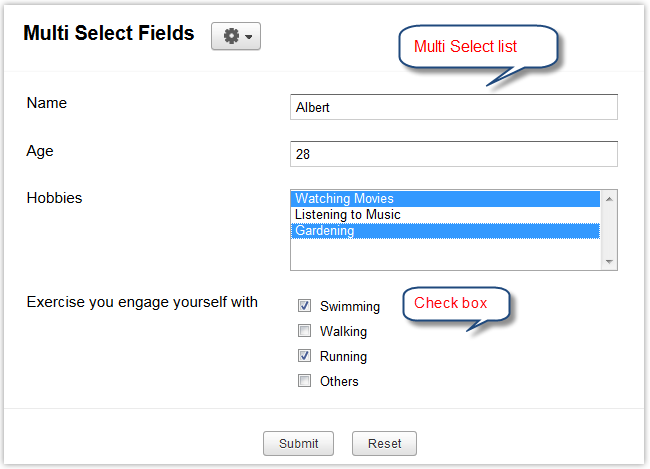
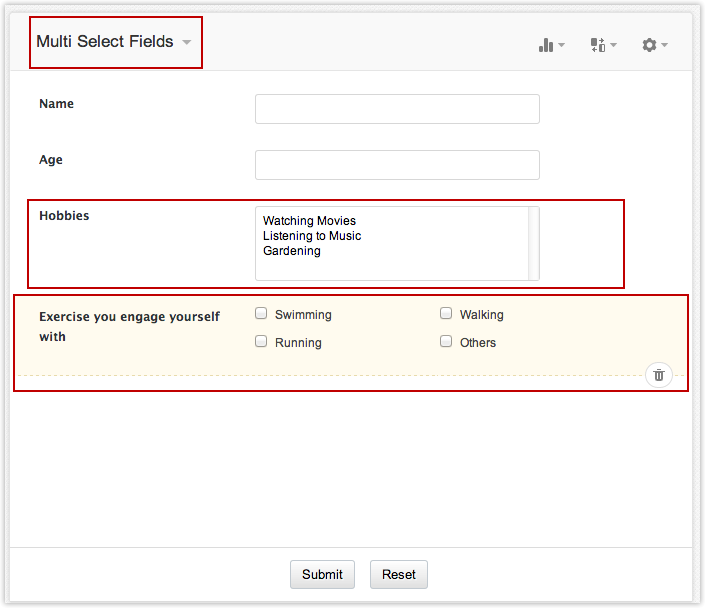
Screen-shot of a sample form with Checkbox and Multi Select fields
Configuring a Checkbox field type
- Drag-n-drop the Checkbox field type to the editor area.
- In the Field Name textbox, enter the Field name that will be displayed in the form. The Deluge name of the field will be same as the field name with underscore instead of white spaces, and will be assigned automatically by Zoho Creator. This name is used to refer to the field in script mode.
- By default the Checkbox will be arranged as one columnar layouts. To arrange them in two or three columns, select the required option from the Field Layout list box.
- If you want the drop-down choices to be displayed in alphabetical order, checkmark the option Alphabetical order under Field Properties. Refer the link Field Configurations to learn more about each configuration.

- You can edit the field configurations or to add field action scripts in the Field Properties, if required.
- When you Access the application, the drop-down field will be displayed in your form with the specified choices. Users can open the list and make the required selection.
Configuring a multiselect field type
Drag-n-drop the Multi Select field type to the editor area as shown below.The Multi Select field type can either be Checkbox or Drop Down button.
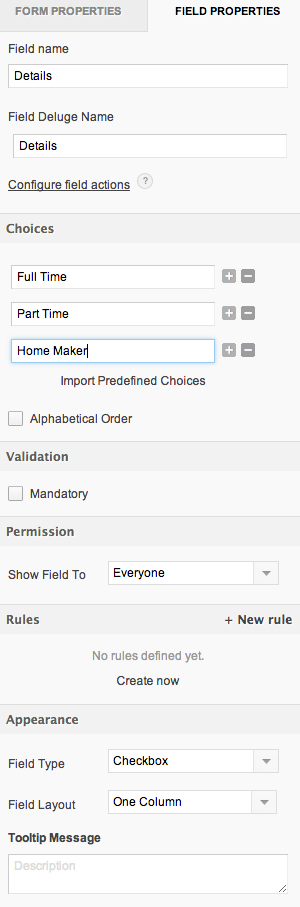
To customize your Multi Select field, Click on Field Properties.
- In the Field Name textbox, enter the Field Label name that will be displayed in the form.
- In the Choices text area, enter the choices to be listed for this field, one per line.
- If you want the drop-down choices to be displayed in alphabetical order, select the checkbox Alphabetical order. Refer the link Field Configurations to learn more about each configuration.
- You can edit the field configurations or add field action scripts, in the field properties.
- When you Access the application, the Checkbox field will be displayed in your form with the specified choices. Users can select the relevant checkboxes.
Validation
Make Field Mandatory
Setting a field to Mandatory, forces the user to fill a value for the particular form field.
GUI
To make a field mandatory through GUI, please refer the following link.
Script
To make a field mandatory through script,
- Go to edit mode of the application.
- Click on the Form Actions --> On validate from the workflow tab.
- Enter the code and click on "Save script " button.
- The mandatory option is now enabled for the particular field.
For example, the sample script shown below indicates the user that the field value is mandatory and requires data to be entered in the field.
if ( (input.Product == "") )
{
alert "Please enter the value for the field";
cancel submit ;
}
In the above code, input.Product is the field where the field value is mandatory.
Permission
The permission option supports the show/hide functionality to create forms that hide the information from the user or adjust the fields while the user is entering the data . There are two possible ways to perform this action.
GUI
To enable the show/hide functionality from the GUI, please refer the following link.
Script
- Go to Form Actions -> on add ->on load .
- Enter the code and click on "Save script " button.
- Now access the application to find the changes made in the script section.
In the Form Actions -> On Add -> On Load script of the form, hide the required fields, for example, Field 1 and Field 2 by adding the following piece of code as shown below.
hide <field name>;
How-Tos
1) How to configure a Checkbox field with six choices to return a error message if less than three fields are selected?
Ans: Use the "size()" built-in Deluge function to return the number of elements in the list. Refer sample script given below. You can add the script to the On Add -> On Validate section. Here, Checkbox_1 is the name of the checkbox field in the form.
if (Checkbox_1.size() <3 )
{
alert "Please select at least three options";
cancel submit;
}
2) How to count the total number of checkboxes selected?
Ans: You can achieve it with the “size()” function. Lets say you have created a field named "Number" to count the number of checkboxes selected in a form. Add the following script to the On User Input block of the Number field:
Number = input.Checkbox.size();
3) How to send a mail with values selected in a multi-list field?
Ans: Iterate Records in a Picklist
4) How to dynamically filter a Multi Select field?
Ans:The method of filtering a Multi Select field is very similar to dynamically filtering single-select dropdowns as described here. However, the problem with filtering a Multi Select is that when you edit the record the filtered list is not shown and all the checkbox options given in edit mode are listed instead. Filtering it again causes the selected options for the record to be lost. The workaround is to add a script in the On Edit >On Load task that saves the selected options, filters the list and sets the selection back again.
1. Create the Multi Select with dummy options, note that when selections are saved in the field those options will be saved automatically
2. Setup dynamic filtering in the same way as for dropdown fields
3. In the On Add > On Edit action of the form write the following code:
x = List();
for each opt in input.Courses
{
x.add(opt);
}
clear Courses;
rec = CourseForm [Criteria == input.School];
Courses:ui.add(rec.Courses.getall());
for each y in x
{
Courses.select(y);
}
First save the checked options in the Course field
Clear it and filter it so that it shows the correct courses for the selected School
Set the previously selected options again