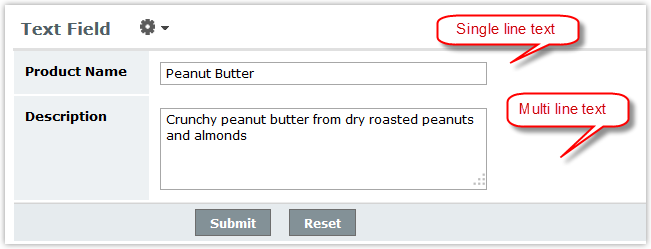
A text field can be either a single line or multiple lines. Text fields are one of the most common fields you will see on the internet. They are a box on a web page that visitors are able to select and type text into it. You can enter any kind of character into a text field.
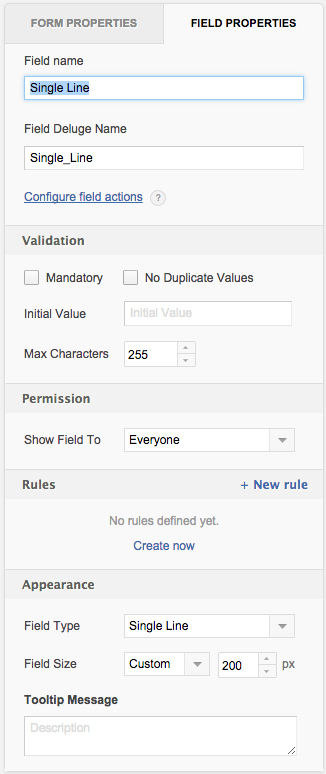
Single-line text field: Use a single line text field to hold plain text or data that doesn't fit well into any other type of field. A single-line text field can contain a maximum of 255 characters.
Multi-line text field: A multi- line text field is also similar to a single-line text field, but with more text area. It can contain any type of character and is appropriate for a comments or a notes field in a Form.Zoho Creator allows only 65,535 bytes (~64kb) of data in the multi-line text field. Refer the Known Issues and Limitation section for more information.
The String datatype is used in scripting for both single & multiline text field type.
Setting a field to Mandatory, forces the user to fill a value for the particular form field.
To make a field mandatory through GUI, please refer the following link.
To make a field mandatory through script,
For example, the sample script shown below indicates the user that the field value is mandatory and requires data to be entered in the field.
In the above code, input.Product is the field where the field value is mandatory.
Now you can set a default value for a field in the form. There are two possible ways to perform this action.
To set default value for a field through GUI, please refer the following link.
You can use this option to set up dynamic values to fields. Setting today's date for a Date field, current time for a Date-Time field, logged in user's email for Email field are some examples.
This can also be used for the fields where you see the "Initial Value" option missing.
1. In the edit mode, click on workflow tab.
2. Go to On Add -> On Load script section of the Form.
3. Enter the code shown below and click on "Save script " button.
4. Now you can see the default value in the field while accessing the application.
Selecting a field value unique for a particular field will not accept any duplicate values while submitting the form. There are two possible ways to perform this action.
To set a field value as unique for a field, please refer the following link.
To make a field value unique in scripting,
The sample script shown below is an example for making a field value unique through scripting.
The permission option supports the show/hide functionality to create forms that hide the information from the user or adjust the fields while the user is entering the data . There are two possible ways to perform this action.
To enable the show/hide functionality from the GUI, please refer the following link.
In the Form Actions -> on add ->on load script of the form, hide the required fields, for example, Field 1 and Field 2 by adding the following piece of code as shown below.
Maximum number of fields in a form depends on the type of fields used and the maximum length of the field. Below are the limitations related to Single Line text field type.Form can have maximum of 80 text fields with max length of 255(SingleLine). This can be increased by reducing the max length value.