Create New Role
By default, the CEO and Manager roles are enabled for your Zoho Creator paid account. In addition, you can create different types of roles for users based on their position in your organization hierarchy and the type of your Zoho Creator Edition.
Note
- This feature is available only for new accounts created after April 2014. We are currently working on migrating the old accounts to support this feature. Note that migration is taking place on request basis. Please contact support@zohocreator.com for any clarifications.
To create new roles
- Click Settings > Users & Permissions > Roles.
- In the Roles page, click New Role.
- In the New Role page, do the following:
- Enter the Role Name. Do not add a role with the same name.
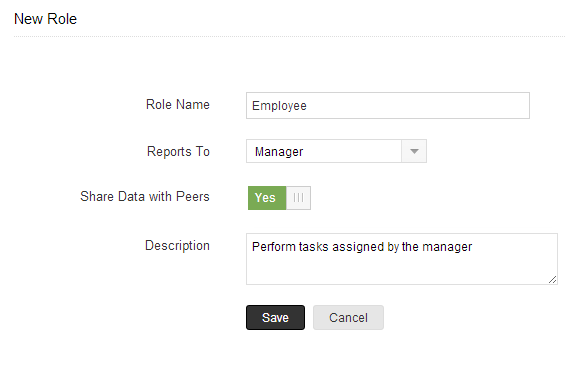
- Select the immediate superior's role from the Reports To lookup. If you do not select the superior's role, the new role will be created under the CEO role.
- Select the Share Data with Peers check box if you would like to enable access rights to peers.
- Specify the Description for the role.
Assign Roles to the Users
After creating roles, you can assign them to the users in your organization. A user with an Administrator profile will have access to all the data irrespective of the role assigned to the user.
To assign roles to the users
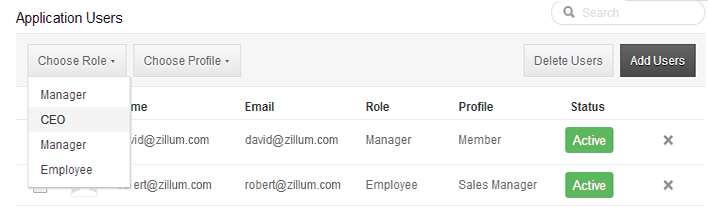
- Click Settings > Users & Permissions > Users.
- In the Users page, select the required user.
- Select the specific Role from the Choose Role lookup box.
- A confirmation dialog is displayed with Yes/No button. Click Yes to update the changes.
Edit Roles
You can modify the user roles as per changes in your organizational hierarchy. As part of the modification of the roles, you can perform the following:
- Rename the role
- Change the Superior Role
- Change the setting for sharing data with Peers
While changing the role names, all the data sharing rules will be updated automatically. So you don't need to calculate the data sharing rules or update the user details.
Note: A user with an Administrator profile will have access to all the data irrespective of the role assigned to the user.
To edit a Role
- Click Settings > Users & Permissions > Roles.
- In the Roles List, click the Role name.
- In the Role Details page, click Edit.
- In the Edit Role page, update the new properties for the role.
- Click Save.
Delete Roles
You cannot delete the existing roles without transferring the users to a new role.
To delete a Role
- Click Settings > Users & Permissions > Roles.
- In the Roles page, click the Role name.
- In the Role Details page, click Delete.
- In the Delete Role page, click on an existing Role to transfer the child-roles to the selected role.
- Click Transfer & Delete.
Now the role and child-roles are transferred to the new role and a different organization hierarchy is created.