
Autodiscovery Settings IMAP and ActiveSync (Outlook)
Autodiscovery is a service that enables easy configuration of your email accounts in Outlook using the IMAP or ActiveSync protocols. The procedure varies depending on whether you want to configure it for IMAP or ActiveSync.
Autodiscovery:
The Autodiscovery service ensures that email accounts can easily be configured in Outlook using the IMAP protocol or in mobile devices using ActiveSync. If Autodiscovery is configured, you will not need to enter the server details, port number etc. Just by entering your email address and password, you can configure your email accounts. User configuration and the following deployment is done easily, and it saves time for organization administrators while deploying email accounts for large organizations.
Configuring Autodiscovery for IMAP:
To configure Autodiscovery in IMAP, there are two major steps involved.
- Adding an SRV Record in your DNS Manager or uploading an XML file.
- Login to Outlook using an email address in your domain.
You will not need to enter any of the server details while logging in.
Adding SRV Record:
- Login to your DNS provider.
- Go to the DNS Management page, to add an SRV Record.
- Click Add to add a new record.
- In the Type field, select SRV from the options listed.
- Enter the following details in the respective fields:
- Service: _autodiscover
- Protocol: _tcp
- Name: @
- Target: autodiscover.zoho.com
- Priority: 0
- Weight: 0
- Port: 443
- TTL: custom
- Seconds: 3600
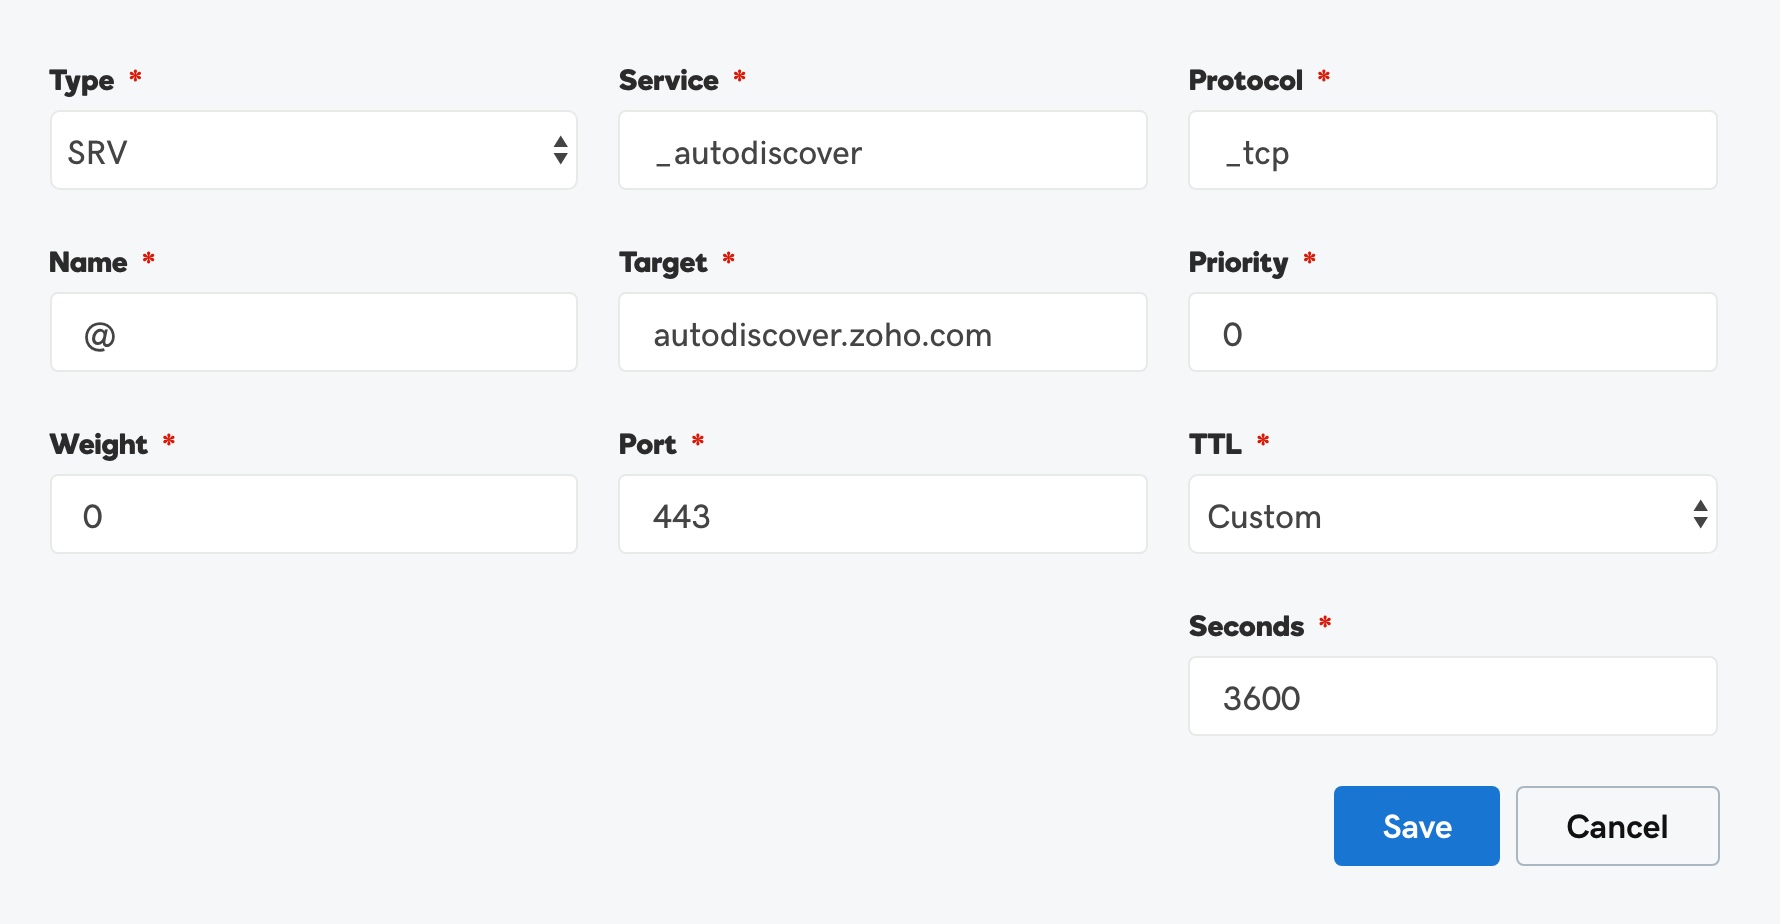
- Now click Save after you have entered these details.
After adding the record, please wait for TTL value for the record to propagate. You can check whether the record has been added properly by entering your domain name in the MX section of the TTL checker tool .
Once the record has propagated, follow the configuration instructions for Outlook.
Instead of manually adding this record, you can also upload an XML file by following the instructions given below, and then configure in Outlook.
Uploading XML file:
To configure Autodiscovery for IMAP for your domain, you need to have web hosting enabled for your domain. In addition, you need to purchase an SSL certificate for your domain as well.
If the above conditions are in check, follow the below instructions for configuration:
- Contact your webhosting provider.
- Get them to add a folder named autodiscover.
- In this folder, create an XML file named autodiscover.xml
- Click here to view the sample XML file for IMAP configuration.
- After creating this file, go to https://<domainname>/autodiscover/autodiscover.xml and make sure that the XML file that you added is listed.
- If the file is listed, you can proceed with configuring your domain's email accounts using IMAP.
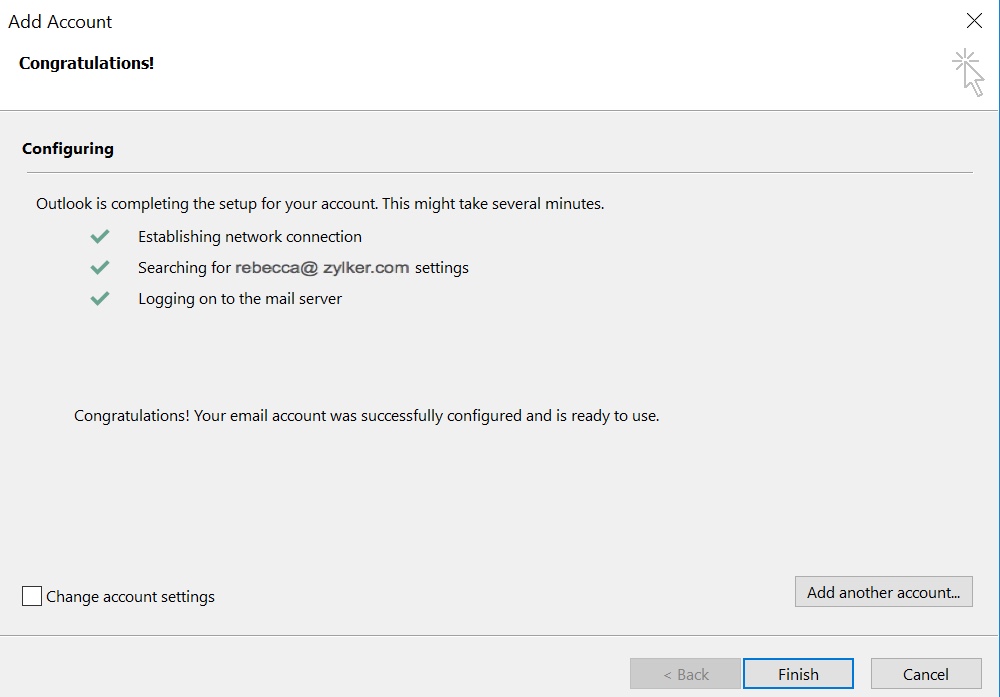
Configuration in Outlook:
- Launch the Microsoft Outlook application in your system.
- Click File and select Add Account.
- Select the Email Account option.
- Enter the name of the user, the Email Address and the Password of an account from your domain.
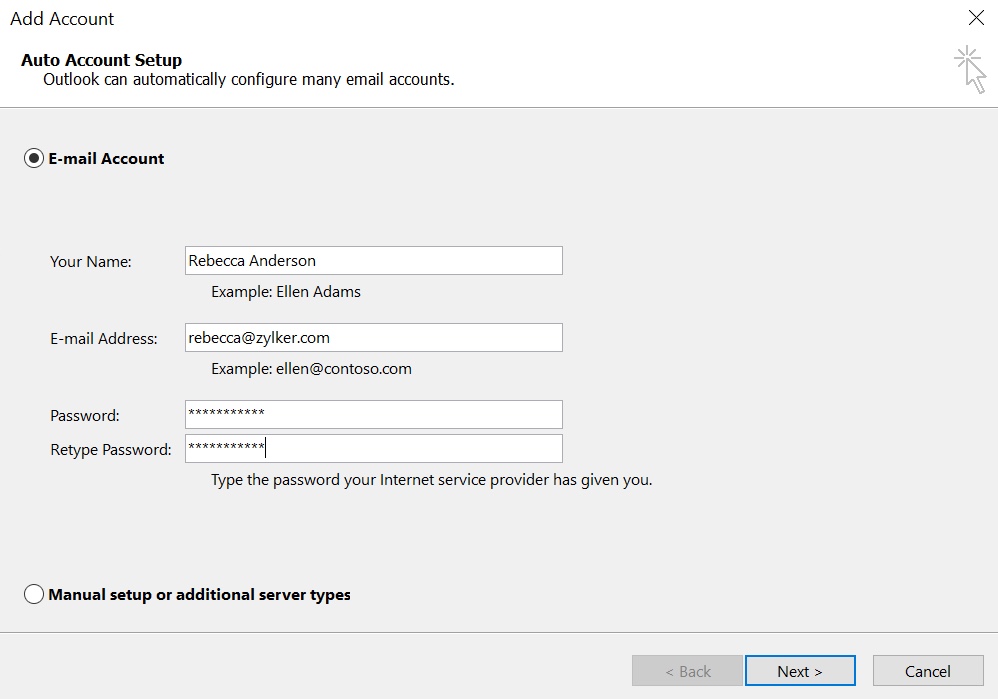
- Now click Next.
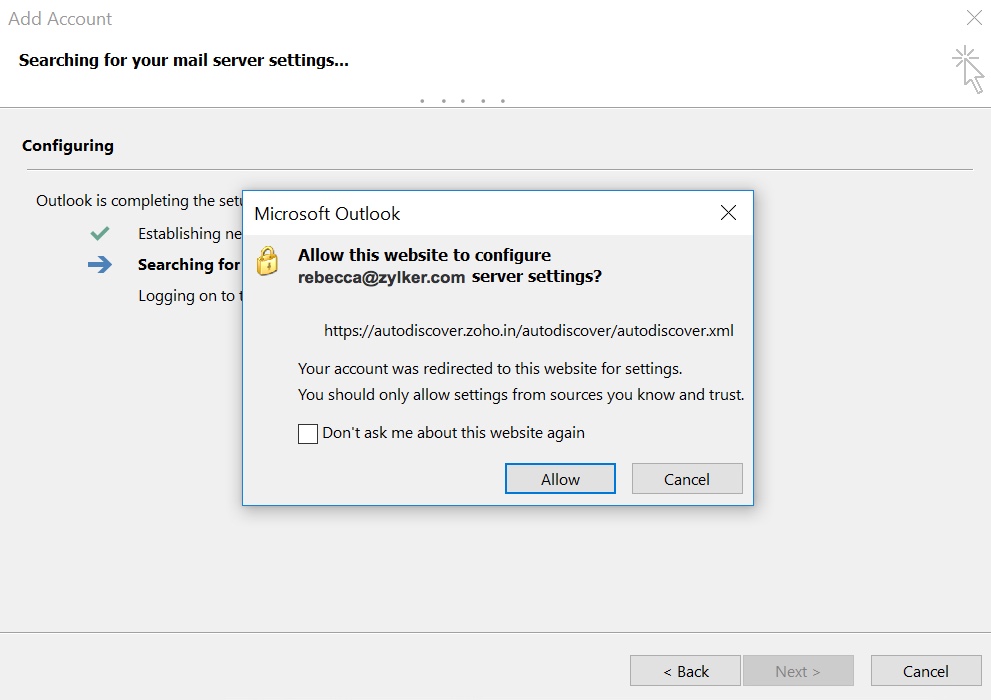
- Click Allow if you are asked to authorize the particular website to configure your server settings.
- After the configuration is done, click Finish.
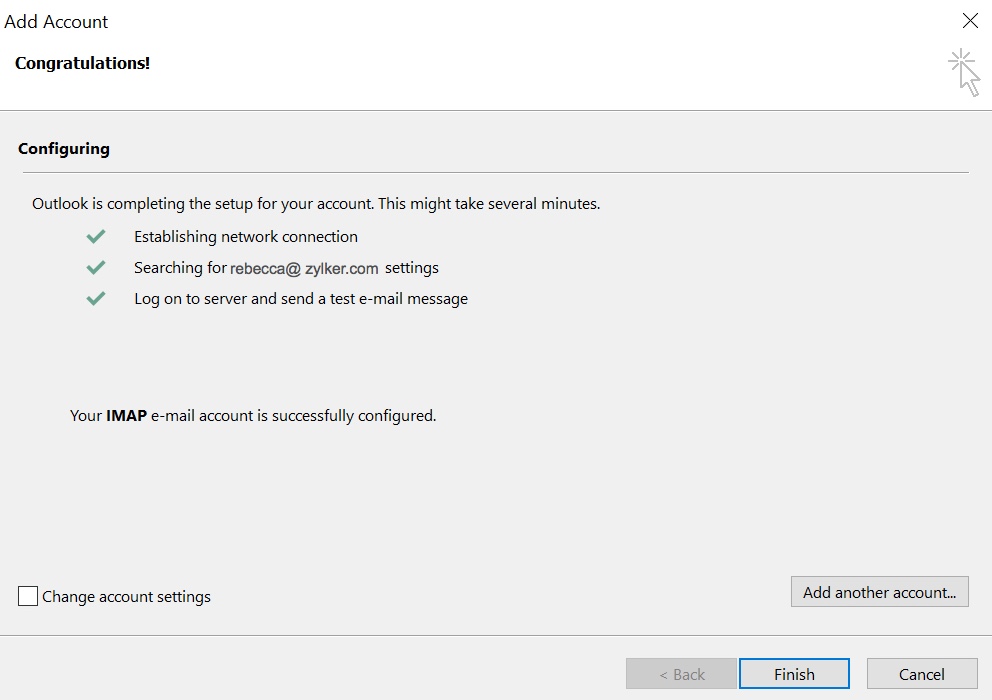
This email address from your domain will now be configured in Outlook as an IMAP account. Similarly, you can configure other user accounts in few simple steps.
Configuring Autodiscovery for ActiveSync:
To configure Autodiscovery for ActiveSync for your domain, you need to have web hosting enabled for your domain. In addition, you need to purchase an SSL certificate for your domain as well.
If the above conditions are in check, follow the below instructions for configuration:
- Contact your webhosting provider.
- Get them to add a folder named autodiscover.
- In this folder, create an XML file named autodiscover.xml
- Click here to download the sample XML file for ActiveSync configuration.
- After creating this file, go to https://<domainname>/autodiscover/autodiscover.xml and make sure that the XML file that you added is listed.
- If the file is listed, you can proceed with configuring your domain's email accounts using ActiveSync.
- Follow the same steps as above to configure your email in Outlook.
- Finally, after the configuration is done, click Finish.
Your account will be now be configured in Outlook using the ActiveSync protocol. Similarly, you can configure other user accounts in few simple steps.