Zoho Creator uses Reports to display the data collected via Forms. In the Reports section we learned about the different report creation formats supported by Zoho Creator and how to create and configure new reports with criteria, filters, sorting, grouping, access permissions and other parameters. When you access the application, the reports you have configured in the reports tab will be displayed with the records, based on the configurations made. For example, in the Sales Database application we have configured the Sales report to display records from the Sales Form, in List View format and grouped by the column named Category. A screen-shot of the Sales report is given below.
Who can view records?
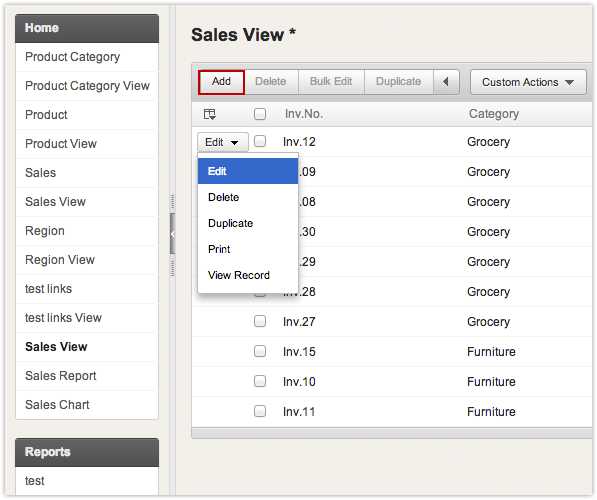
The Add, Edit, Bulk Edit, Delete, Duplicate buttons will be displayed to the app owner. The Bulk Edit, Duplicate and Delete buttons will be displayed only when one or more records are selected in the report.
Shared users can Add, Edit and Delete records from a report only if Access Permission is provided by the application owner. For example, if the application owner has provided permission only to add new records in a report, his shared users will be able to see only the Add button in the report.
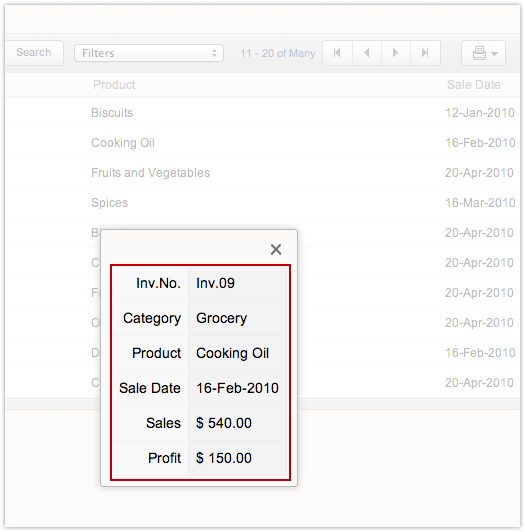
Select the Edit button for a record in the list report and mouse over to View Record. It will display the summary of the record as shown in the screen-shot below. By default, the record summary will display all the columns you see in the report.
To do this,
The app owner/users can change the sort order of any column in the report in ascending or descending order by selecting the Sort option. To remove sorting, select the Sort -> Remove Sorting option. The modified report can be saved as a new report by selecting Settings -> Save Changes option. Refer Creating Personalized Reports. The app owner can also configure sorting from the Reports tab. Refer the topic Reports -> Set Sorting to configure from the report tab.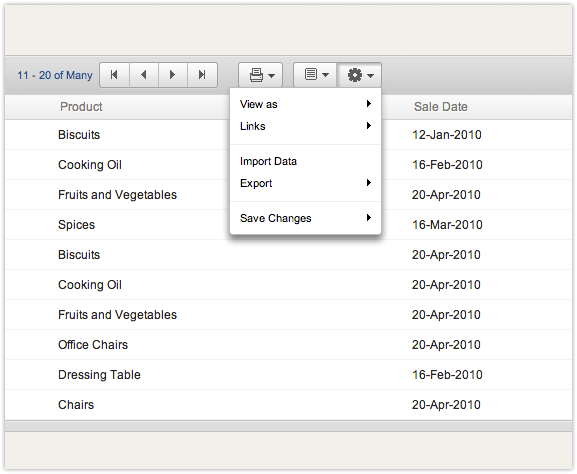
Group by any column in ascending/descending by selecting the Group option. The records will be listed based on the column grouped. The modified report can be saved as a new report by selecting Settings icon -> Save Changes option in the live mode of the report. Refer Creating Personalized Reports. The app owner can also configure grouping from the reports tab. Refer the topic Reports -> Set Grouping to configure from the reports tab.
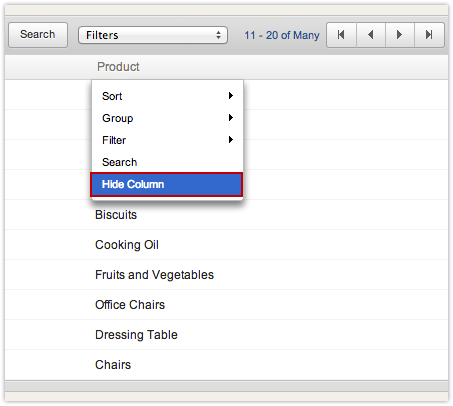
You can Hide columns from being displayed in the report by selecting the Hide column option. The column will not be displayed in the report. To display the column again in the report, select Show/Hide columns icon near the report header. The app owner can also configure to Hide columns from the report tab. Refer the topic Reports -> Show/Hide Columns to configure from the reports tab.
The Settings -> Save Changes option will be displayed when any changes are made to the report in live mode. When you click on the Save changes option, the dialog displays the changes made to the actual report. You can save the changes to the same report by selecting the Save option. To create personalized reports,
1. Save the changes as a new view by selecting the Save as New View checkbox.
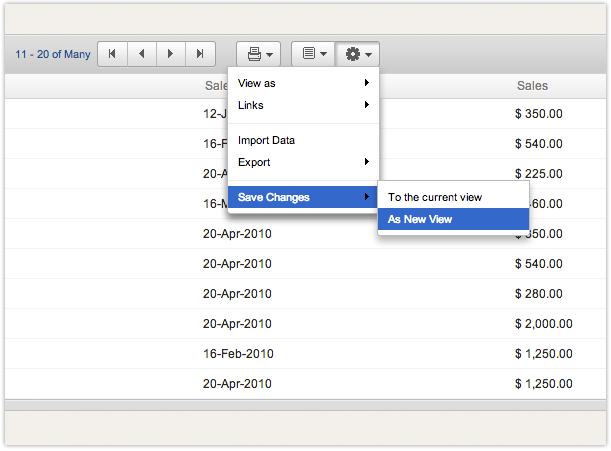
2. Specify the new view name and then click on the Save option. The new view will saved and listed.
In addition to the above actions, users can view the same data in different view formats, export data as HTML, PDF etc., print data, show/hide columns in the view and create new views by saving the configuration changes. The app owner can import data to existing views, get the view permalinks and embed the view in his website/blog. Refer More View Options.
The Settings option in the Report Header enables a shared user to view data in different formats, export data as Html, PDF etc., print data, show/hide columns in the view and save as new view. The option to import data, get the view permalink and embed in website will be displayed only when the application is accessed by the app owner.
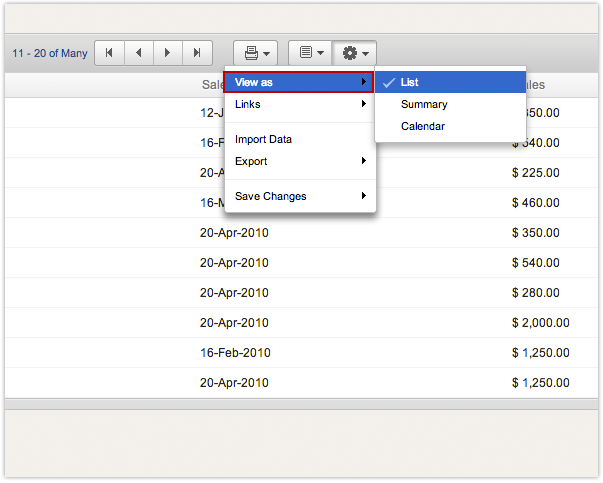
Selecting Settings -> View as will enable the app owner/user to change the view type to any other format supported by Zoho Creator. For example, in the screen-shot given below, we selected the option View as -> List to display each record as a row in the table. Note that the Save Changes option is added to the list of More Actions to save the changes made to the view.
Zoho Creator supports iCal Feed for views (list, summary or grid) which has a Date-Time field in its list of selected columns. To subscribe to an iCal Feed, copy the iCal Feed URL generated by Zoho Creator and paste it into your favourite iCal reader. Refer the topic iCal Feed for more information.
The app owner can add record to the report by importing data from an excel file. For example, if you have Sales data stored in an excel file, you can directly transfer this data to your Sales database. Refer the topic Import and Export Data for more information.
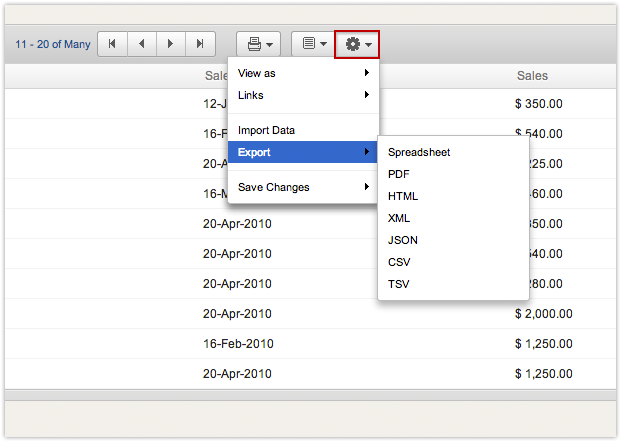
The app owner/user can export data anytime in the format of Grid (excel format), PDF, HTML, RSS, JSON, CSV and TSV. Currently ZOHO Creator supports PDF rendering for List views and HTML views only. Refer the topic Import and Export Data for more information.
All Zoho Creator reports has in-built print support to print data. Refer the topic Print Data for more information.
If the app owner does not want to share his application with users, he can just get the View permalink and send this link to his users to view data or embed the link in his website/blog. Refer the topic Form and Report Permalinks for more information.
The app owner can embed the report in his website/blog, just by pasting few lines of code. Refer the topic Embed Forms and Reports for more information.
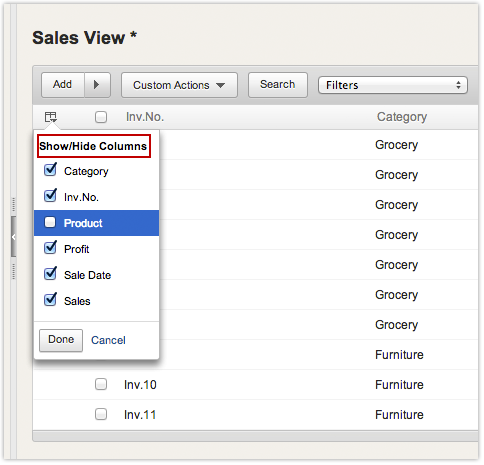
The app owner/user can Hide columns from being displayed in the report or Show the columns that was earlier configured as Hidden by selecting/deselecting the columns from the Show/Hide dialog. Only the selected columns will be displayed in the report. Use the Settings -> Save Changes option to save the changes in the report as a new report.
Show the latest of a clients record that matches a given criteria