Import Data
You can add new records to an existing application by importing data from a .xls, .csv, .tsv file. You can import data in two ways:
- Write/Paste Data from the XLS file.
- Import Data from the XLS files by specifying the file name.
Note:
- Import Data option will be displayed only to the application administrator and not for shared users of that application. Shared users can make use of migration tool to import data.
Write/Paste Data from the XLS file
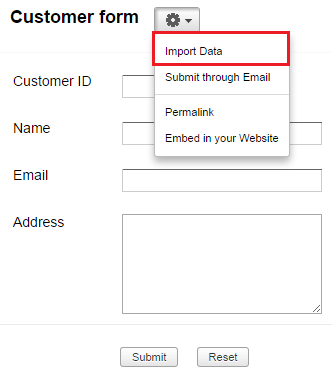
- Access the Form or Report in live mode and click on Settings icon.
- Select Settings icon -> Import Data option from the Form/Report header. The Import Data option will be displayed.
- Select the File Type as Excel, CSV or TSV.
- Select the Paste Data radio button.
- Copy the data from your .xls file or from other file formats that store comma separated values or tab separated values.
- Paste the data copied from your .xls/.csv/.tsv file.
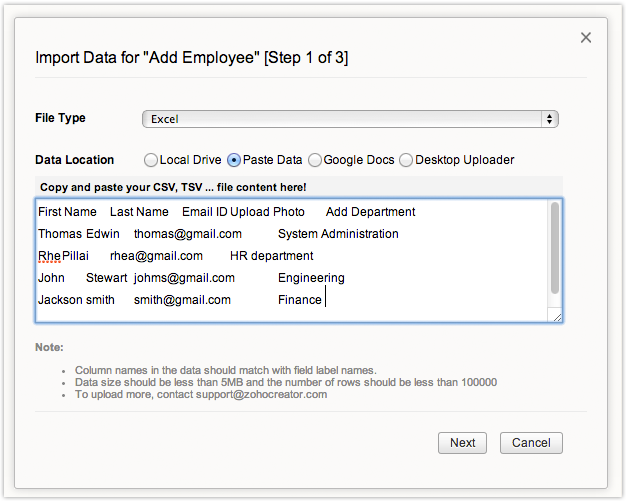
- Click Next to go to the next screen. The next screen will display the data in the following format:

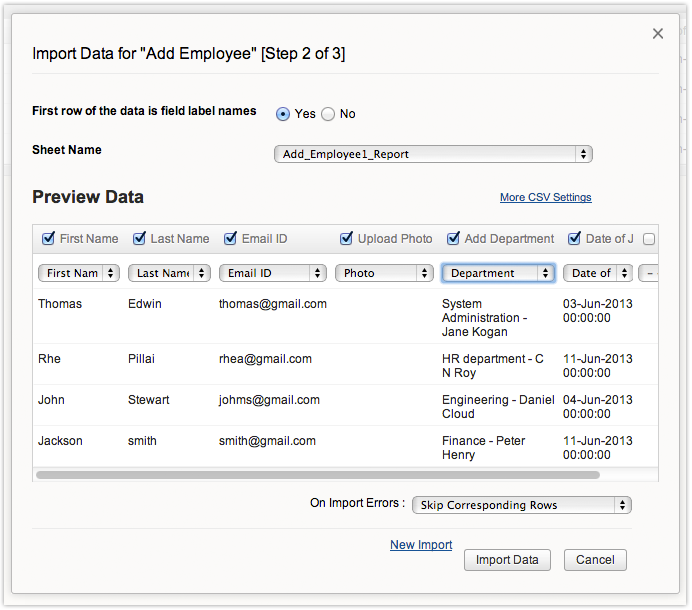
- The data in the first row will be displayed as the default Label Name for each column. If the option First row of data is field label names is checked as "Yes", the first row values will be displayed as label names.
- Select the appropriate field for each column from the Select a Field list-box displayed below the label names.
- Select the appropriate option from the On Import Errorslist box:
- Skip Corresponding Rows: If there is any conflict found in any of the row values, Zoho Creator will skip the corresponding rows. Eg. If a row containing an email field type has text, then ZC will not import that row alone and the rest of the rows will be imported.
- Set Empty Values for the column: If there is any conflict found in any of the column values, Zoho Creator will set empty(NULL) values for the corresponding columns.. Eg : If a integer column has text, then ZC will not import that column value alone and the rest of the columns of that particular row will be imported.
- Don't Import the data: If there is any error in the data to be imported, the entire data will not be imported.
- Click Import Data to create the application with the form data. The existing report will be updated with the new records.
Note:
- Make sure column names in the data are same as the field label names.
- Data size should be less than 5MB and the number of rows should be less than 100000, for the data to be imported properly.
- The "Import Data" option will only append new records. You cannot update existing records using this option.
Import Data from the XLS files by specifying the file name
- Go to the Dashboard and select the required Form or Report.
- Select Settings icon -> Import Data option from the Form/Report header. The Import Data dialog will be displayed.
- Select the File Type as XLS, CSV or TSV.
- Select the Local Drive radio button.
- Browse and select the required .xls/.csv/.tsv file to upload.
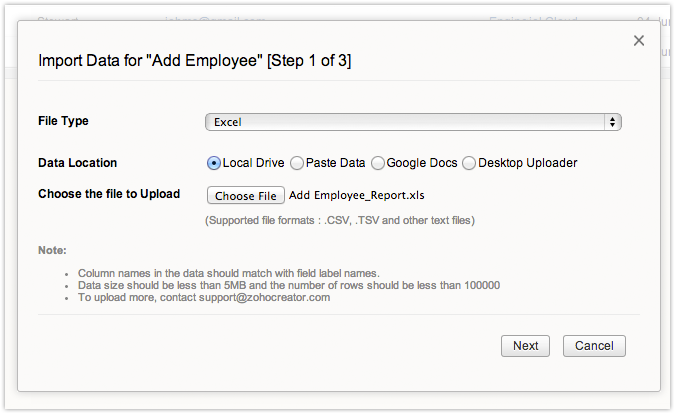
- Click Next to go to the next screen. The next screen will display the data in the following format:
- The data in the first row will be displayed as the default Label Name for each column. If the option First row of data is field label names is checked as "Yes", the first row values will be displayed as label names.
- Select the appropriate field for each column from the Select a Field list-box displayed below the label names.
- Select the appropriate option from the On Import Errorslist box:
- Skip corresponding rows: If there is any conflict found in any of the row values, Zoho Creator will skip the corresponding rows. Eg. If a row containing an email field type has text, then ZC will not import that row alone and the rest of the rows will be imported.
- Set empty values for the column: If there is any conflict found in any of the column values, Zoho Creator will set empty(NULL) values for the corresponding columns.. Eg : If a integer column has text, then ZC will not import that column value alone and the rest of the columns of that particular row will be imported.
- Don't import the data: If there is any error in the data to be imported, the entire data will not be imported.
- Click Import Data to create the application with the form data. The existing report will be updated with the new records.
Note:
- Make sure column names in the data are same as the field label names.
- Data size should be less than 5MB and the number of rows should be less than 100000, for the data to be imported properly.
- The "Import Data" option will only append new records. You cannot update existing records using this option.
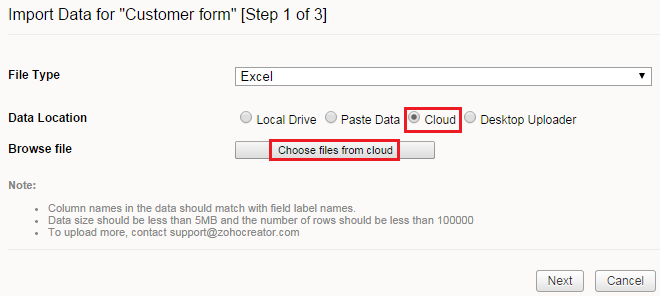
Import Data from Cloud
Zoho Creator offers multiple cloud storage options, from which you can import and populate data in a form. This cloud picker feature supports the following cloud storage services:
- Google Drive
- Zoho Docs
- OneDrive
- Dropbox
- Box
To import your files from any of these cloud storage services,
- Go to Settings -> Import Data option on your Zoho Creator form or Reports page.
Screenshot displaying Import Data option on Zoho Creator Form
Screenshot displaying Import Data option on the Report page

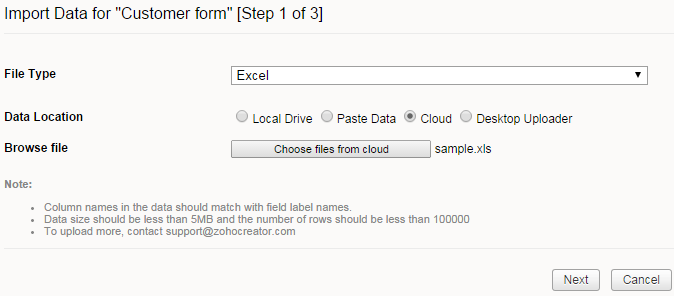
- Click on Cloud -> Choose files from Cloud and click on "Next".
- Now select the cloud service, which contains your files, from the left pane. You will have to authenticate yourself, for the cloud storage service provider, to access your files.

- Once authenticated, select your file that needs to be imported and click on Attach.

- The selected file now gets attached. Click on Next to fill the form with the data present in the attached file.
Import Data by using the MS Access & Excel Migration Tool
Please refer this page to know about using the migration tool to import data.
Import data with hyperlinked text
To import data with hyperlink, use the following format in your import sheet:
< a href= "http://www.zoho.com" >Visit Zoho < /a >
where,
Visit Zoho is the hyperlinked text
http://www.zoho.com is the link to which the hyperlinked text redirects
Export Data
The Export Data feature in Zoho Creator enables you to export your data anytime in the format of Grid (excel format), PDF, HTML, RSS, JSON, CSV and TSV. You can export data as spreadsheet and take it to Zoho Sheet if you want to do some analysis, export it as PDF if you want to print/email the data, export as HTML to view data in your browser, use RSS feed to subscribe to changes in the data or javascript based JSON feed, use CSV, TSV formats when required.
To export your data to different formats,
- Click on Export option displayed on the top-right corner of the view header, in Live mode.
- Select File Download tab and click on the required format to download the file.

Zoho Creator does not currently support disabling the Export option in the view. However, if the view is embedded in a website, the Export option will not be available to the users.
Supported Export formats
Spreadsheet: Data can be viewed in Microsoft Excel, Openoffice, Spreadsheet and Zohosheet.
HTML Document: Data can be opened in internet browsers like Internet Explorer, Firefox, Safari etc.
PDF Document: Portable Document format is a printer-friendly document format supported by Adobe Reader, Foxit Reader, PDF XChange, etc. Currently ZOHO Creator supports PDF rendering for List views and HTML views only.
CSV Feed: This format is used for exchanging data between various spreadsheet programs.
TSV Feed: Flat-file format commonly used for inter-application data transfer.
JSON Feed: A javascript-based, lightweight data exchange format.
RSS Feed: XML-based format for allowing people to subscribe to changes in the data. Supported by Bloglines, Google Reader, Netvibes, etc. To get the RSS feed url:
1. Click on Settings - Links - Permalink option from the top-right corner of the report in live mode. If your report is private, use the Publish option in the Permalink dialog, to get the public permalink. The permalink will be displayed in the format given below.
https://creator.zohopublic.com/<application_owner_name>/<app name>/view-perma/<view_name>/<encrypted code>
2. Reframe the above url in the format given below to get the RSS feed url.
https://creator.zoho.com/<application_owner_name>/<app name>/rss/<view_name>/<encrypted code>
Once you copy the link and submit it in a RSS feed reader you will be able to see the latest 25 records submitted. To see the entire records, add complete=true at end of the link.
The RSS feed is automatically updated. The frequency with which the RSS feed is updated depends on the Feed reader used and how often the feed reader is configured to fetch the updates from the form/view. We have performed some tests on various Feed Readers and the update time varied from one to another. On an average the RSS update time limit varies between 5-10 minutes.
Export HTML Page to PDF
You can Show or Hide the PDF export option in your HTML page by selecting Settings --> Header Option from the HTML page header, in Edit mode. To learn more about the URL formats to export HTML page to PDF refer the topic Functionality based URLs -> Convert HTML page to PDF.